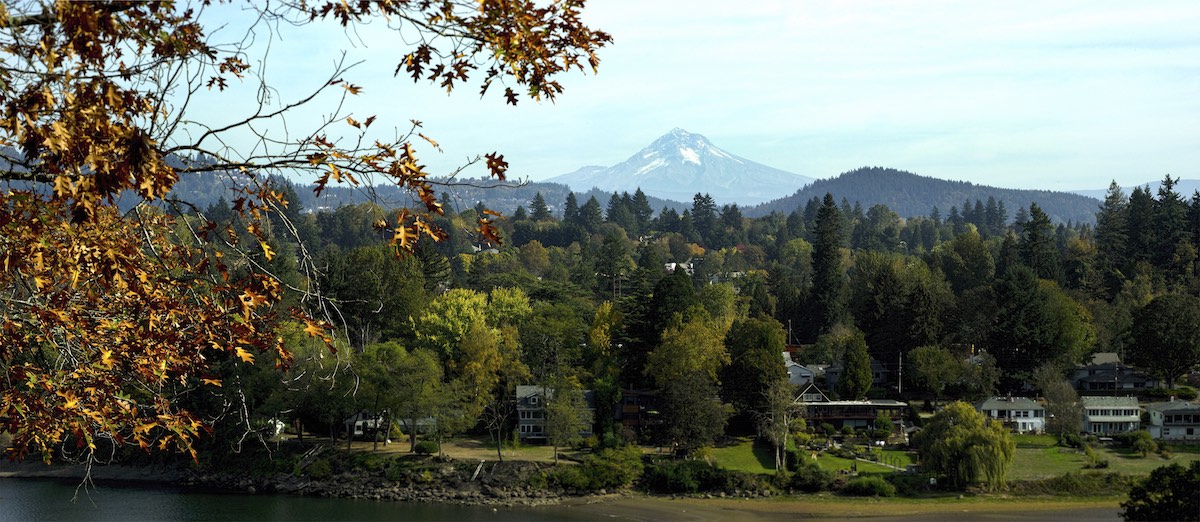
Trees provide shade, help freshen the air, and even add value to your property. We all want our trees to stay strong and healthy, but what should you do if you think one of your trees might be dead?
Dead trees don’t just look unattractive, they can actually pose a safety risk. Dead trees are more fragile. They drop branches easily and may even fall completely if not taken care of properly.
Today, I’ll show you how to tell if your tree is dead, and what you can do to keep your home, property, and family safe.
What Causes Trees to Die?
Trees live hundreds of years, right?
Many of them can, but damage and diseases can unfortunately kill a tree prematurely. In an ideal world, you’d notice the warning signs early on.
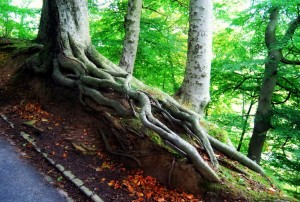
When a tree is dying, the cause of the problem usually starts underground with the roots and soil. Luckily, you can often see signs of tree death and disease above ground.
Here are some of the most common reasons why trees die:
Too Much or Too Little Water
Making sure your tree gets enough water is especially important when it’s young. Too little water can dry a tree out, while too much can drown it.
How much water your tree needs depends on the type of tree you have and where you live. The Arbor Day Foundation has some helpful tips for how much to water your tree at each stage of its growth.
Contact your local certified arborist if you have more questions about how to water your tree.
Changes in the Soil Grade
Changes in the soil level around your tree can affect how much water and nutrients the tree can absorb. That’s because trees’ primary feeding roots are usually located in the top six inches of soil. Changing the soil grade by even just a few inches can create a problem.
If you’re thinking of adding soil to your yard, be careful. Avoid adding too much near your tree if you can.
Root Damage
Trees need their roots to absorb nutrients and even remain standing. Big trees have strong, sturdy roots, but even those roots can be damaged.
If you have frequently driven over or parked on a tree’s roots, there’s a chance they were damaged.
Not only can the weight of a car damage roots, but all that weight also compacts the soil beneath it, making it harder for the tree to get the water, oxygen, and other nutrients it needs from the soil.
Pouring concrete, laying asphalt, or paving over tree roots can cause similar problems. If tree roots don’t have room to grow, or something is preventing them from feed from the soil, you may have a problem.
Improper Planting or Transplanting
Young trees are especially sensitive, so planting and transplanting them can be risky. A couple common mistakes are:
Digging a too shallow or too deep hole
Packing the soil down too hard after planting
Both can smother the tree and prevent proper root growth.
Tip: Any time you plant or transplant a tree, be careful of the root ball (the tangle of roots at the bottom of a young tree). If there is burlap or twine tied around the roots, remove it carefully. Then, gently loosen and separate the root ball just enough to help the roots spread out before you place the tree in the ground.
The warning signs will be slightly different depending on what type of tree you’re dealing with. Usually, though, you’ll be able to tell if there’s something wrong.
What should you look for?
Falling Leaves or Needles
A tree that is dying or dead often loses its leaves or needles very quickly and suddenly. Or it has no foliage whatsoever, even during a time of year when it should.
Changing Colors
Unexplained discoloration of the foliage is another common sign of stress or disease — usually one of the first ones you’ll notice.
Brown, multi-colored needles are a common sign of sickness in conifer trees.
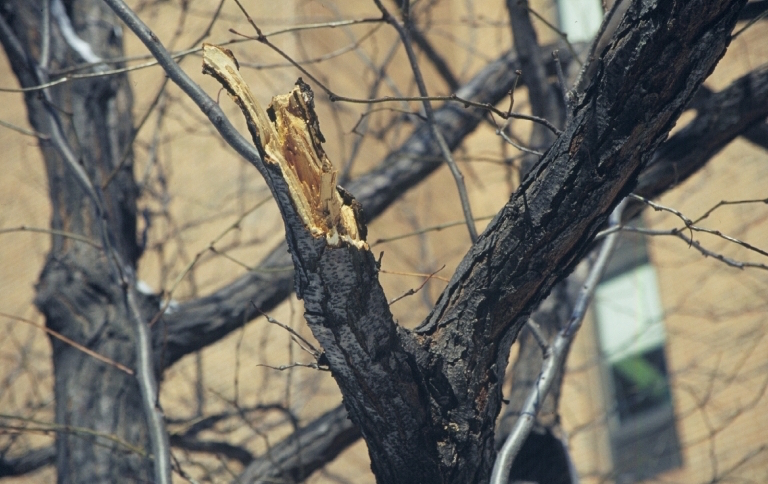
Cracks and Splits
Big cracks or splits in the structure of the tree can be a sign that the tree is dead, especially if other warning signs are also present or if the crack is in the trunk.
Changing Bark
A strange or different bark texture can also spell trouble. Tree bark is often a good indicator of the tree’s overall health. If bark is missing, loose, dry, or brittle, be concerned. When branches lose their bark, it means those branches are most likely dead.
Infections and Infestations
Animals and fungi often start taking over dead trees too. Fungus usually only grows on decaying wood, so keep an eye out for mushrooms!
Insects like carpenter ants and beetles often set up camp in dead wood too. Look for rows of small holes in the wood or places where wood has clearly been eaten away:
A weak or spongy trunk can be a sign that a tree is rotting from the inside. If you notice this, call your local certified arborist right away. Rotting in the trunk is a sign that your tree may no longer be stable. You’ll want to get it taken care of before branches start falling, or worse, the whole tree comes down.
What Can I Do if My Tree Is Dead?
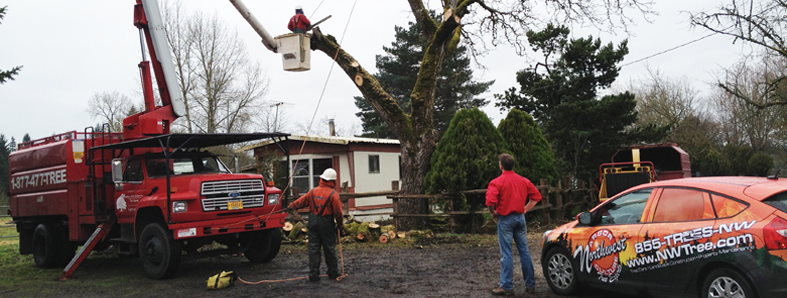
If your tree is dead, your best option is to have a professional come and remove it safely. If it’s a large or precariously positioned tree, you’ll want to do this as soon as possible.
If your tree is simply old, sick, or just unstable, you may have other options besides tree removal, such as cabling and bracing. Depending on the cause and extent of the damage, you might be able to salvage your tree or at least increase its life.
No matter what state your tree is in, an arborist, like us at Northwest Arbor Culture, can help you determine the best course of action for keeping your home safe and beautiful.
If it turns out your tree needs to be removed, we can help. We’ll even get rid of the stump for you! With over 30 years of landscaping experience, we can also help you decide what to do with the empty space or help you reconfigure your entire yard if you like!
If you’re worried about one of your trees, don’t wait until it’s too late.
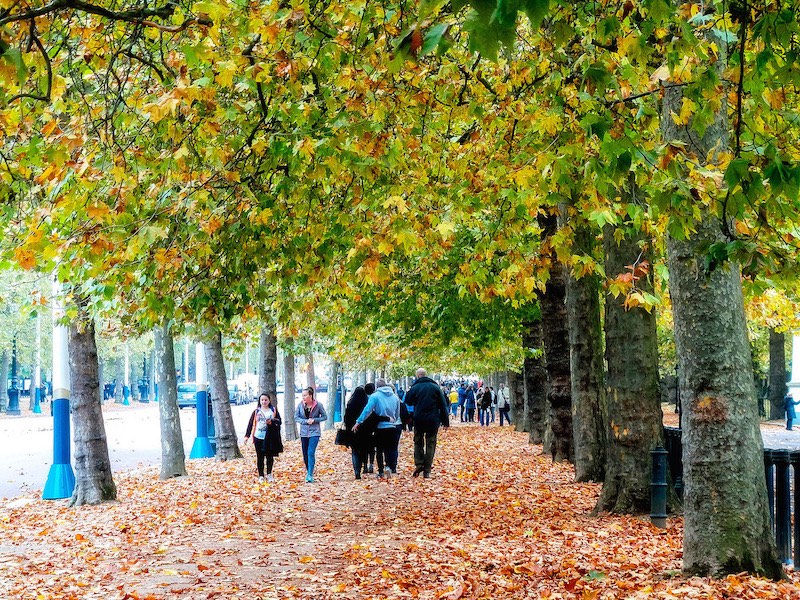
Last month, I showed you the best trees to plant if you live in the Portland area. Today, I’ll tell you why planting trees is so important and how you and your community can benefit! For example, did you know that planting trees can actually make you healthier? Believe it or not, it’s true!
But that’s not the only benefit of planting trees in your yard. Keep reading to find out 6 more great reasons to plant trees in Portland.
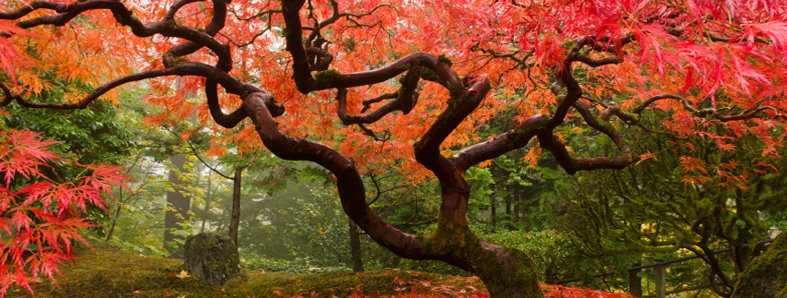
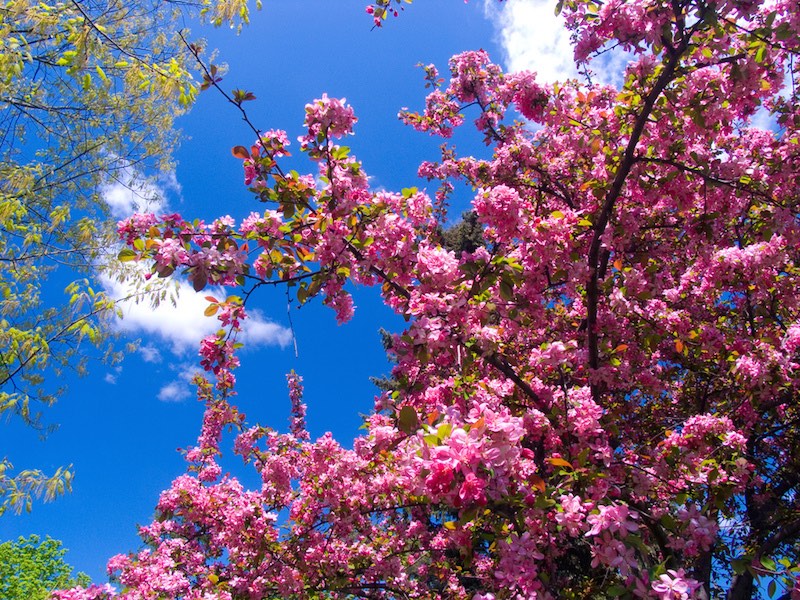
Because Trees Are Beautiful!
Trees are like one-of-a-kind works of art that you can help create.
No two trees are alike. Some are tall and thin, others short and full of leafy branches. Some turn gorgeous vibrant colors in the fall, others are a beautiful green all year round, and some even bloom beautiful flowers in the spring!
Trees are full of interesting shapes, textures, and even sounds! There’s really nothing else like them.
If you plant a tree in your yard, you’ll get to pick exactly what you’d like to see, and you’ll be able to enjoy it for years to come.
People who live in areas with more trees tend to have lower blood-pressure and have improved overall psychological and emotional health. Kathleen Wolf, a researcher at the University of Washington in Seattle, even says that people with ADHD are calmer and more relaxed when they live near trees!
Helping the Environment
Remove Pollution
Unfortunately even green, eco-conscious areas like the Pacific Northwest suffer from air pollution. Sulfur dioxide, ozone, nitrogen oxides, and other chemicals are all released from cars, trucks, and other sources of pollution.
Believe it or not, trees can actually catch and prevent these pollutants from making their way into your lungs! This can help reduce the symptoms of asthma and other respiratory illnesses.
If you’re an allergy sufferer, there’s good news for you, too! The Portland area and surrounding Willamette Valley frequently have the highest pollen counts in the country. Luckily, in addition to absorbing man-made pollutants, large, leafy trees can keep pollen, dust, and other natural allergens out of your home and out of your nose and lungs! You’ll breathe easier with trees in your yard!
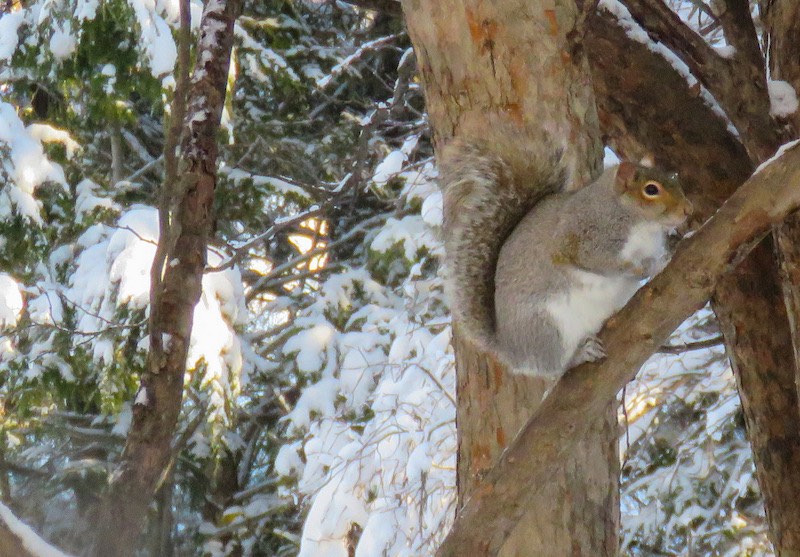
Provide Home to Local Wildlife
In addition to helping you feel better, there are other environmental reasons to plant trees in Portland. Trees make great homes for birds, squirrels, and other animals. Trees also provide a food source for these animals in the forms of nuts, fruits, and insects that call the trees home, too.
Birds and insects that nest in trees can also help pollinate nearby flowers and plants. This helps to build a natural, healthy ecosystem for all plants and animals in the area! By planting a tree, you’re doing your part to preserve our natural plants and wildlife.
Conserve Water & Minimize Erosion
Did you know that 100 trees can catch 250,000 gallons of water every year?
Without trees and their complex system of sponge-like roots, rainwater soaks directly into the ground, causing erosion, and potentially dangerous landslides. Trees and their roots soak up rain, and release it slowly, minimizing the risk of damaging erosion.
Provide Privacy
When you live in a city like Portland, or even in a densely populated suburb, it can be hard to find a quiet, private place to call your own– even in your own yard! That’s where trees can help. Their branches, leaves, and trunks can make your yard and home feel more private. They block out city noise and traffic sounds, and keep nosy neighbors at bay, too!
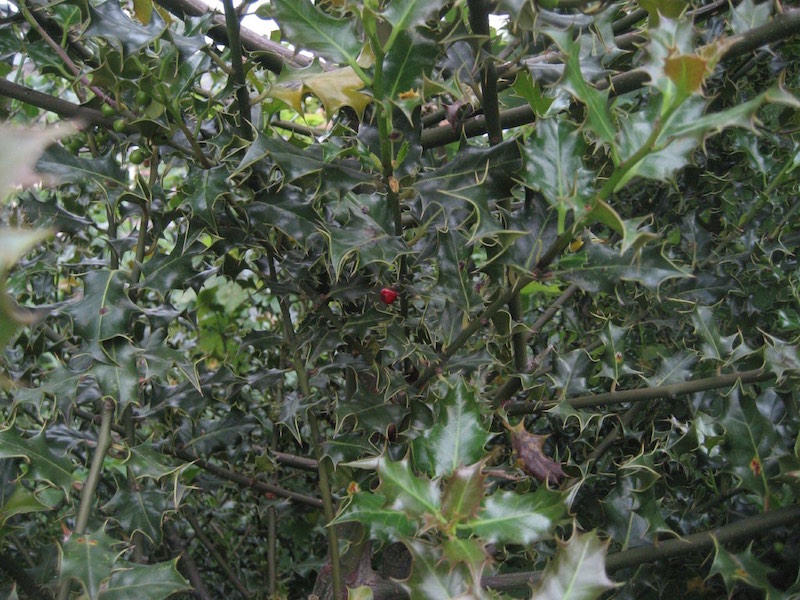
In the Portland area, trees like holly, bamboo, and cedars are great trees to plant for privacy. They grow quickly and densely and don’t require much maintenance. They also have a small footprint, meaning they grow straight up, don’t spread out too much, and stay right where you want them to grow!
Conserve Energy & Save Money
Many Portland-area homes don’t have air-conditioning. We’ve had some real hot days these past few summers and it can be hard to keep cool!
Once again, trees to the rescue! Shade trees like maples and dogwoods have large leafy branches that absorb sunlight and heat, reducing heat gains by up to 80%! This keeps your house cooler and can reduce your cooling bill, if you do have air conditioning!
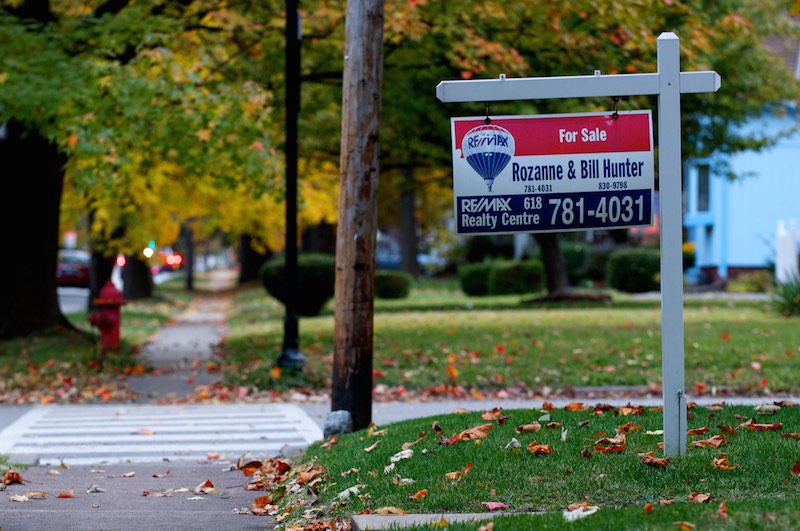
Increase Your Property Value
According to a recent study, homes with well-maintained yards and trees tend to sell faster and fetch a higher price! One thing to keep in mind, however, is that the study focused on yards with mature trees. That means you should start landscaping and planting trees now, because it might take several years for a young tree to mature.
Why do trees improve property value? It’s not entirely clear, but experts think it’s a combination of all the benefits trees provide, from privacy to beauty and everything else in between. Even if home buyers don’t realize it, subconsciously they’re attracted to homes with beautiful trees and they’re willing to pay for it!
Build Community
An ancient proverb says, “A society grows great when old men plant trees whose shade they know they shall never sit in.”
That’s really something when you think about it. In my opinion it’s the best reason to plant a tree. Even though you may benefit from the tree in your lifetime, your children and their children will get to enjoy that same tree’s shade, fruit, and beauty for generations to come.
Plus, if you live in Portland and plant a fruit tree, like an apple or fig tree, you can even contact the Portland Fruit Tree Project. They’ll come out and pick the fruit from your tree and provide it to people in need! What a great mission and one that’s easy to support. All you have to do is plant a tree!
When’s the Best Time to Plant a Tree?
People often ask me about the best time to plant a tree. My answer?
The best time to plant a tree is 5 years ago. The second-best time is today. By planting a tree today, you’re taking the first step towards reaping all the benefits of planting a tree that I talked about today. Planting a tree is an investment, and the sooner you invest, the sooner you’ll start seeing returns!
If you’re interested in planting a tree, contact me. I’m a certified arborist and can help you plant the perfect tree in your yard. Call (503) 538-8733 today and ask for a free consultation.
If you’re a homeowner in Portland, planting a tree can be a great investment. Not only are trees beautiful, but some studies show they can actually increase the value of your home. Plus, trees are functional, too. Their root systems help hold soil in place, their branches can be home to birds, squirrels, and other wildlife, trees provide shade and privacy, and some even grow fruit you can enjoy!
But what are the best trees to plant in Portland? How do you care for the trees you plant? And what do you need to know before planting your first tree?
Keep reading to find out.
Where to Plant
Deciding where to plant a tree is just as important as the tree you decide to plant. A tree planted in the wrong place may end up dying or not growing to its full potential or it may even do damage to your home.
Safety first!
Don’t plant trees where they may interfere with overhead power lines.
Remember that trees will grow for years and years, so it might take some time until they cause a problem. There’s nothing more frustrating than investing time and money nurturing a tree and then discovering that it needs to be cut down.
Don’t forget about underground utility lines. Before planting any tree, contact the Oregon Utility Notification Center at (503) 246-6699 to find out if there are any buried lines you need to be aware of.
Protect Your Home
Improperly planted trees can be dangerous to your home. We recommend you plant any tree at least 10 feet from your home and 5 feet away from your fence or property line.
By doing so, you’ll protect your roof from falling branches, keep your gutter from filling with rotting leaves, avoid cracks in your foundation from your trees’ roots, and reduce the chance of your trees creeping over into your neighbor’s property.
Choose a Location Carefully
As a tree grows it may block natural light. Depending on your point of view, this may be a benefit or a drawback. Sometimes you want a tree that will provide more privacy, but you may not want to block out our precious Oregon sunshine.
When choosing a location, also consider the plants and trees you already have in your yard. Some trees and plants are “thirsty” and require more water than others. Too many thirsty plants and trees in your yard may require you to use more water than you’d like.
If you have questions about which trees and plants work well together, get in touch with me. I’d love to help you out.
What to Plant
Once you’ve decided where to plant a tree, you’ve got to choose what type of tree you’d like to plant. Luckily, living in Oregon there are plenty of great choices!
I recommend choosing trees to plant based not on their appearance, but their purpose. A leafy deciduous tree may look beautiful from the street, but if you hate seeing leaves on the ground, you’re going to regret planting one in your yard.
Let’s look at a few reasons why you might want to plant a tree, as well as a few of the best trees for each purpose.
Street Trees
Street trees are trees planted between your yard and your sidewalk. They provide a bit of privacy and can look great too.
In Portland, the city has strict requirements about the types of street trees you can plant. Depending on where you live in the city, you might be able to plant one of the following trees:
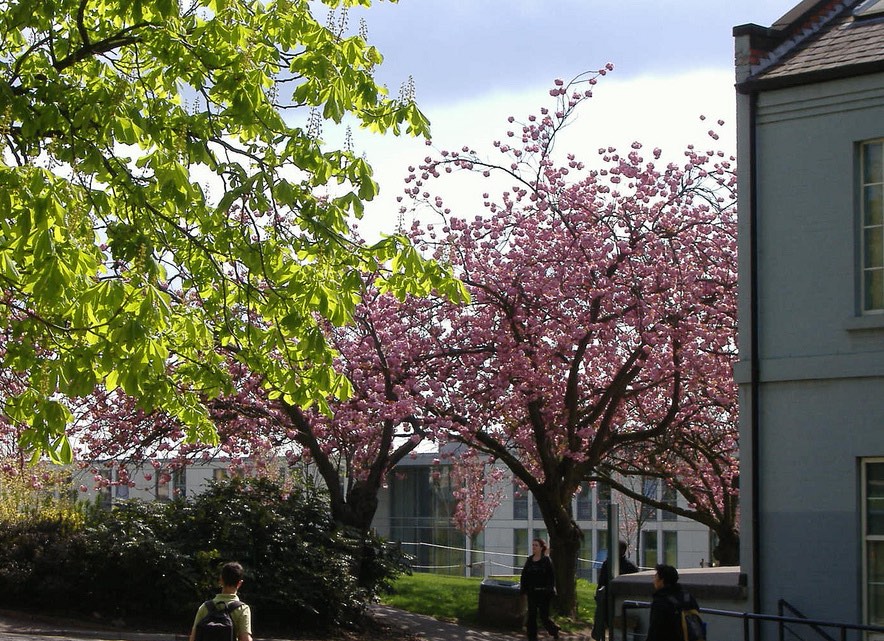
Alders are beautiful trees that flower each March. They grow quickly and look great!
ElmsThere are many varieties of elm trees that can be planted as street trees. They grow quickly and have really great fall colors!
Trees for Privacy
If you’re planting trees near your fence or property line for extra privacy, you’ve got a few good options. Look for trees with thick dense branches and leaves, like:
HollyHolly is a fast-growing, dense evergreen. It’s one of the most popular trees to plant when you’re looking for privacy or security.
Cedar trees grow quickly, are tolerant to drought conditions, and also resistant to most insects and other pests.
Fruit-bearing Trees
Trees that bear fruit can be fun to have in your yard! They can provide tasty and nutritious fruit for you and your family to enjoy. But harvesting the fruit can be a bit of a chore.Luckily, in Portland there’s the Portland Fruit Tree Project, a group who will take fruit from your trees and give it to people in need. What a cool idea!Some of my favorite fruit trees to plant include:
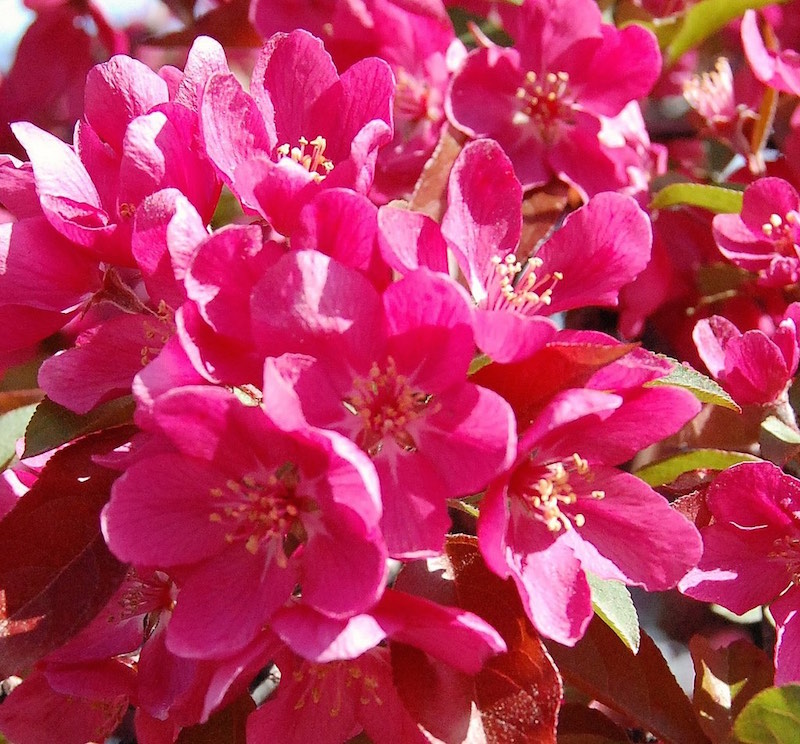
Apple TreesApples are a classic Pacific Northwest tree that can produce delicious fruit for years and years. Just look at the color on those blossoms!Cherry TreesCherry trees grow quickly and their fruit is really easy to pick!
Fig trees grow quickly and produce a lot of fruit that can be made into jams and jellies, or eaten right off the tree! Most fig trees will produce fruit twice a year, once in the summer and once again in early fall.
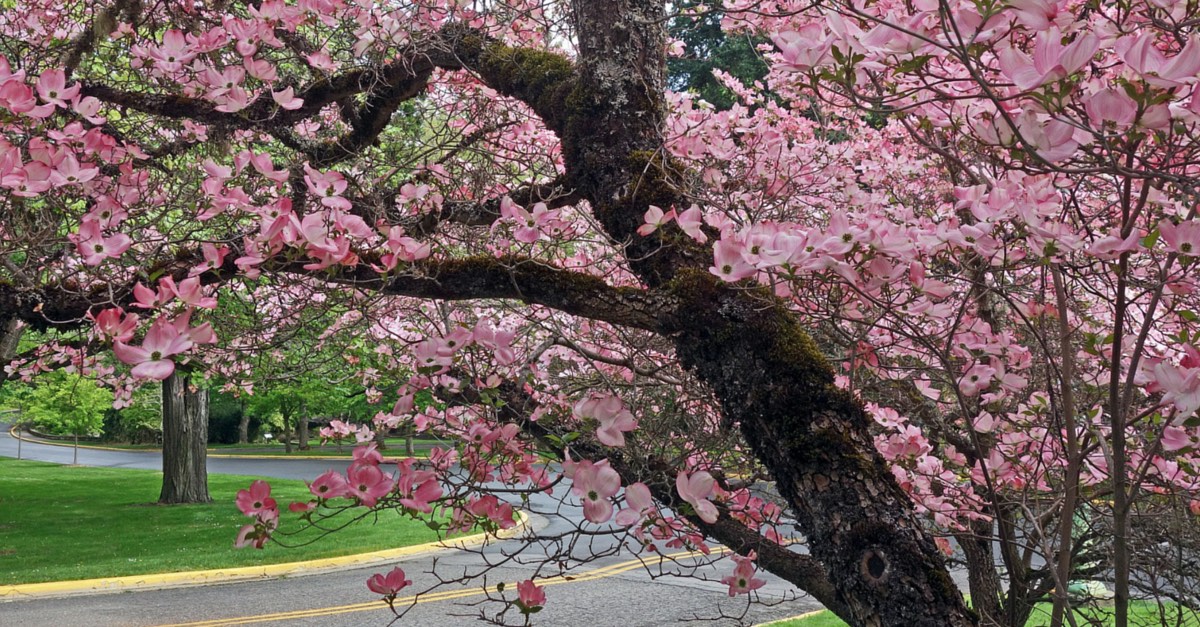
Shade Trees
A nice shade tree or two can protect your lawn, keep hot sun off your windows, and give a bit of privacy too.
Dogwoods provide great shade and are some of the most beautiful flowering trees, too.
Caring for Trees
Caring for trees isn’t as hard as you might think. When they’re young, they don’t need much more than mulch and water. Depending on the type of tree, your tree may need to be staked to keep it grow straight.
As trees grow, however, they are likely to need a bit more maintenance. You may need to rake their leaves or prune their branches to keep them from getting out of control. Some trees may also need to be checked for insects, fungus or disease to keep them healthy.
If you need help caring for the trees you plant in your yard, get in touch with us. At Northwest Arbor Culture we have over 30 years experience caring for trees in the Portland area.
Call us at (503) 538-8733 for a free estimate and to learn more about how we can help you and your trees!
Curious about a tree on your property? Or just want to impress your friends next time you go hiking?
Today, we’ll be talking about Tree Identification 101: how the experts identify trees and the features they look for.
I’ll also show you an easy tree identification tool anyone can use in Oregon.
First, let’s look at a few of Oregon’s most common trees.
Trees You’ll See in Oregon
Oregon is a big state with a diverse climate. Some trees grow really well in western Oregon but not eastern Oregon, and vice versa.
The most common tree statewide is the Douglas fir, Oregon’s state tree. It’s by far the most common tree species in western Oregon, but it’s easy to find them in eastern Oregon too.
The Douglas fir is characterized by blunt green pine needles and 3-4” pine cones with pitchfork-shaped brackets.
Use this great resource from Oregon State University to check out more of the most common trees in Oregon.
Did you recognize your tree as one of those? If not, or if you want to be sure, keep reading!
Let’s look at the tree identification process and how the experts use it.
How Do Experts Identify Trees?
Oregon is home to so many different species of trees that it takes a lot of practice to learn to identify trees by sight alone. Even tree experts often refer to tree guides.
When experts want to identify a tree, the first thing they look at is its leaves. The shape, size, spacing, and even color of a tree’s leaves can tell you a lot.
Tree Features to Look For
When you examine a tree’s leaves, what should you look for? In a minute, I’ll show you a free, comprehensive tree identification tool you can use to go through the examination process step by step. But first, let’s see the three main features most tree identification guides will ask you to look at.
Conifers vs. Broadleaves
This is step one. Pretty much all Oregon trees can be split into two big categories: conifers and broadleaves.
Conifers are evergreens. They often bear cones and have leaves that look like needles or scales. Broadleaves are deciduous (not evergreen) trees. They have flat, thin leaves and shed them in the winter. Unlike conifers, broadleaves often grow flowers or fruit too.
So, the first step in tree identification is to check whether the leaves are needle-like, scaled, or flat and thin.
Spacing of Leaves
The spacing of leaves tells you a lot too. If you’re dealing with a conifer, are the needles fairly evenly spaced along the branch, or are they bunched together in a clump or a fan-like shape? How many needles are in a clump?
You can look for the same pattern with broadleaves. Are the leaves compounded (lots of leaves fanning out from a single twig) or are they simple (single leaves sticking off of twigs or small branches)? See the difference here. Do they alternate along either side of the branch or are they exactly opposite each other?
Answering those questions will help you narrow down your search so you can get closer to identifying your tree!
Shape of Leaves
Finally, look at the shape of the individual leaves. If it’s a conifer with needle-like leaves, how long are the needles? Do they have little pegs or buds on them? Do the needles have different colors?
If it’s a broadleaf, what are the leaves shaped like? Do they have lobes or are they basically oval? Are their edges smooth or jagged? Are they thick and leathery or thin and delicate? Are their undersides a different color? And what kind of fruit accompanies the leaves, if any?
Now you know the basics, you’re ready to use an identification tool to find out the exact species of your tree!
Using a Dichotomous Key
Dichotomous means split into two. A dichotomous tree identification key is a tool that lets you identify a tree by making a series of choices between two alternatives.
You’ll start by telling the key whether your tree is a conifer or a broadleaf. Then you’ll move on to more specific questions from there.
Here’s what you’ll want to have handy:
Access to the internet
A ruler
The ability to get up close to the tree you want to identify
Now it’s time to get up close to the tree. If you can, take your tablet, phone, or laptop out to look at the tree, and go through the steps there.
If that’s not possible, take several detailed pictures of the tree before you start using the key. Make sure you get good close up pictures of the tree’s needles and leaves. Take some basic measurements of individual needles or leaves to get a sense for how big they are.
It’s that easy! Just make sure you’re certain about every choice you make before you move on to the next one.
What’s Your Tree?
Are you planning to try the key? Did you already identify your tree? Let us know what kind of tree you identified! And if you ever have questions about the health or safety of any of your trees, give us a call!
Want to learn more about tree identification? Check out these resources:
Tree pruning is healthy. Think of it as a haircut — you’re not hurting the plant, just keeping things in the best shape and paving the way for future growth. But you don’t want to disfigure your shrubs. Misguided hacks can prevent your tree from blossoming that year. Consider this your quick guide to the best time of year for tree pruning and shrub trimming.
First, an important note: Dead branches, those in the way of pedestrians, and those that could damage your property can be removed anytime. Don’t wait with a dangerous situation. If you have a tree emergency, you can call us 24 hours a day at 503-538-8733.
When to Prune Trees: Winter
Overall, the best time to prune your trees is when they’re dormant, so late winter to early spring is ideal. (In fact, that’s the only time to prune birch trees and American elms.) For shade trees like ash and oak, winter is the perfect time. Deciduous fruit trees like apples, cherries, and pears should also be pruned in midwinter.
Oregon State University horticulturist Ross Penhallegon agrees. “November through March is a good time to prune,” he says. “If you are worried about winter freeze damage, wait until after Feb. 1, which is the best time to prune in western Oregon, and March 15 east of the Cascade Mountains.” Not only is it less traumatizing to the tree, but it’s easier to see the tree’s structure without all of its leaves. Fall isn’t too early to contact your arborist and set up an appointment for the months ahead.
When Not to Prune
Don’t wait too late! In general, you want to avoid pruning trees during late spring and early summer. That’s when everything is starting to bloom. Trees don’t have enough of a chance to heal before the growing season if you prune them too late. The burst of energy plants get in the spring will help heal small cuts made in the previous months.
If a tree already has leaves, don’t attack them too much — that’s where photosynthesis is happening and where the tree is getting its food. Not enough leaves mean not enough energy sources. Think of leaves as little, flat green batteries that keep the tree running.
Fall is also usually not the best time to prune. Cuts seem to heal more slowly during the fall, and pests or fungi can easily prey on plants. As Oregon State University says, “Pruning during the spring (post-dormancy) and fall (pre-dormancy) is generally the least desirable time as the plant is most vulnerable during those times.” Try to be patient and wait for trees and shrubs to be fully dormant before trimming them.
Although late winter and early spring is generally the best time to trim trees, some have different timelines. Read on for the intricacies of pruning.
When to Prune Flowering Shrubs and Trees
The main determining factor for pruning shrubs is whether they flower on old wood or new wood. Does your shrub blossom in early spring, on old wood from last season? The best time to prune them is right after they bloom.
If your shrub flowers on new wood — it’s a late bloomer, so to speak — the blossoms grow on the current season’s growth instead of last season’s. That means you’re fine to prune these shrubs in late winter to early spring, because you won’t be harming the blossoms yet.
Here’s a handy chart:
Old Wood
Most Plants & Shrubs
New Wood & Broadleaf Evergreens
Blossom time:
Early spring
Spring
Late spring
Best to prune:
After they bloom (early summer)
Winter
Late winter to early spring
Examples:
Lilacs
Shrubs grown primarily for their foliage
Lavender
Rhododendrons
Deciduous shade trees
Roses (mid-February to early March in the Willamette Valley)
Suckers and water sprouts are unproductive offshoots that steal nutrients from the main stem or trunk. They aren’t harmful, but they can be annoying. This is one of the rare times when you shouldn’t take to the pruning shears in the winter, during the dormant season, because that will make water sprouts and suckers come back with a vengeance the next spring. Instead, clip suckers and sprouts in the early summer months of May and June.
Check out this 30-second video about pruning suckers and sprouts:
Is My Tree Bleeding?
When you prune certain trees like maples, birches, and walnuts, they’ll ooze sap. This potentially disturbing sight is trees’ version of bleeding — except they aren’t hurt. In fact, this is completely normal. Once leaves start to grow, the sap will stop flowing.
Why Hire a Certified Arborist for Tree Trimming?
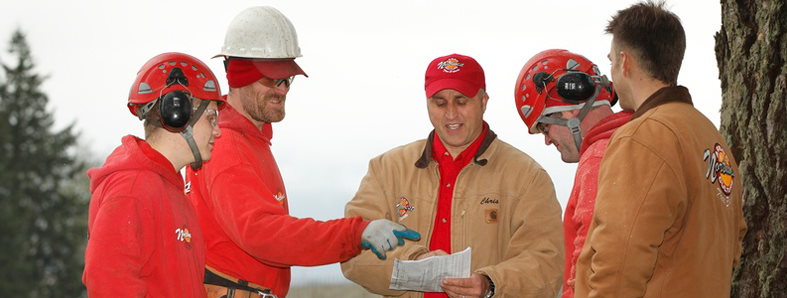
After reading all this, you might feel ready to head out back with your shears and do some trimming. Whoa there, Nelly! I admire your enthusiasm. Unless you’re experienced and quite knowledgeable about trimming and pruning, it’s best to hire an ISA-Certified Arborist® like us at Northwest Arbor-Culture, because we know how to trim your tree or shrub without topping or making dangerous cuts that leave your plant vulnerable to infection.
It’s already September, so it’s never too early to set up an appointment for tree trimming this winter! Call us today at 503.538.8733 or fill out our online form for a free quote.
Building a treehouse is a fun and time-consuming process—especially if you’ve never built one before. They come in all shapes and sizes, from small tree forts to giant luxury hideaways.
In this post, I’ll show you how to build one type of simple backyard treehouse, but I’ll offer plenty of resources along the way for those of you with more ambitious plans.
No matter what kind of treehouse you want, safety is your first priority. If you’re not confident with your building skills or you want an elaborate design, consult a professional treehouse builder, such as Nelson Treehouse and Supply in Washington State.
Have an arborist come out to make sure your tree is safe. Don’t hesitate to call us if you have questions about the safety of any of your trees.
Step 2: Plan Your Treehouse
You’ll Need:
Cardboard and duct tape or a pencil and paper
Every treehouse is different because every tree is unique. Examine your tree for quirks, like a strangely shaped trunk or oddly positioned branches, and plan around them.
Then make a detailed sketch or cardboard prototype of your treehouse. Be sure to include measurements.
You can borrow one of these free treehouse plans or even design your own. And these fun and crazy ideas are sure to spark your creativity.
You want to make your platform strong, level, and not higher than 5 or 6 feet off the ground if kids will be using it.
If this is you first treehouse, WikiHow has good step-by-step instructions on this part. (Note that you’ll be using Garnier limbs, a type of treehouse attachment bolt, instead of the galvanized lag screws they suggest.) For now, I’ll give you a quick explanation.
First, place the 2x10s parallel to each other on either side of the two branches that separate into a V shape, but don’t attach them yet. This is just to help you mark where you want the Garnier limbs, which will be your main support.
Pre-drill into the tree, and then install the Garnier limbs. Find more detailed information on how to safely insert them here.
Now use the metal brackets and screws to attach the 2x10s to each of the Garnier limbs.
This method works great for most people, but every tree is different. To be completely sure your treehouse is safe, ask an engineer to take a look at your plan, and read up on treehouse support safety here.
Step 4: Brace the Platform
You’ll Need:
At least two strong boards (The number and length will depend on the size and shape of your tree and platform.)
Nail the boards to the platform and use Garnier limb standard knee braces to attach them to the tree, like Nelson Treehouse and Supply did with this bold structure.
Important: Depending on the strength of your materials and the weight of your treehouse, you may need to add extra support beams in the ground. I recommend consulting a contractor or professional builder unless you’re absolutely sure.
Use screws to attach the floor to the platform. You may have to do some cutting and sanding to make sure your floor fits nicely around branches.
Step 6: Attach Handrails
You’ll Need:
Enough 2×4 boards to build rails around the entire treehouse except the entrance
Nails
Screws (at least 3”)
You’ll want at least two 2x4s standing vertically in each corner of your treehouse. Screw them to the platform. Use nails to attach the rest of the 2x4s horizontally across the top.
Fill the space between handrails and the platform to stop small treehouse dwellers from falling out. You can use boards, mesh, or plywood sheets.
If you want to build walls instead of just handrails, get some tips from this family.
Step 7: Build Your Access Ladder
You’ll Need:
Several 2-foot long pieces of 2×4
Two long 2x4s
Screws (2.5”)
eHow has great instructions on building a treehouse ladder. Here’s what they suggest:
Find an open space to lay the long 2x4s on the ground parallel to each other.
Start at the base by placing a 2-foot board between them at least six inches from the bottom. Drive three screws through each long 2×4 and into the ends of the 2-foot board. Make sure the small boards will be level and easy to step on when the ladder stands up.
Repeat the same process at the top, again placing the 2-foot board six inches down. Add the rest the same way, making sure they are evenly spaced.
Stain or paint the wood, add a simple roof, or have your family carve their initials into the handrails. Whatever you want! If you live in a damp area, also think about waterproofing your treehouse.
No matter what kind of treehouse you build, have fun and be safe. And share your fond treehouse memories in the comments!
For advice about whether your tree is strong enough, or any other tree questions, call our Certified Arborists at 503-538-8733.
Most of the time, you want tree roots to thrive. But if you’re removing a tree and don’t want regrowth, or if tree roots are dangerously close to something underground, you may need to kill them. It’s something we handle here at Northwest Arbor-Culture, Inc., and some homeowners like to DIY as well. Here’s a basic primer on how to kill tree roots.
How to Kill Tree Roots Naturally, Without Chemicals
An easy way to kill tree roots is to spray chemicals like hexazinone or bromacil onto the soil above, then wait for rain to push the chemicals down to the roots and kill them. But here in the Northwest, we’re pretty eco-conscious, and a lot of folks don’t want to use harsh chemicals. They can leach into our water supply, after all. So here are three ideas for how to kill tree roots naturally.
First, a little education. Trees use their bark to transport water and nutrients from the roots up to the rest of the tree. Girdling is a technique where you cut off the outer layer of bark, making it impossible for the tree to feed itself. The tree and roots will eventually die. This method is natural, but it can take several years if the tree is big. (That’s because trees can store lots of nutrients in their roots, like a backup supply of food.)
If you try girdling, cut the tree bark and treat the cut with undiluted white vinegar. (Substitute herbicide for vinegar if you aren’t as concerned about how to kill tree roots naturally.) If you don’t apply vinegar or an herbicide to the tree wound, you may get suckers, or small offshoots, as the tree creates new growth. Remember, different types of trees will react differently to girdling. If the sapwood is quite thick, it will take longer for the tree to die.
Paving or mulching on top of your tree roots will also kill them. (You’ll need at least six inches of mulch.) Without sufficient air, the roots will die, and so will the rest of the tree afterward. Like girdling, these methods take a while before they are effective.
How to Kill Tree Roots with Salt
Much like suffocating roots by mulching, you can cut off roots’ water supply and they will essentially die of thirst. Rock salt will accomplish this. When you apply salt to tree roots, it absorbs all the water, leaving none to nourish the tree. Let me warn you, though, that salt doesn’t discriminate. It will also kill your nearby plants and grass, so be careful.
How to Kill Tree Roots in Sewer Line
Trees love plumbing because it gives them a steady supply of water. Some people opt for chemical treatments if they discover tree roots in their sewer line. Adding chemicals to your toilet bowl will eventually reach the tree roots in your sewer line and kill them. However, some people don’t want to add chemicals to the water supply. I’ve also heard homeowners try to kill tree roots in their sewer line by flushing rock salt or copper sulfate down the toilet. Copper sulfate in particular is very corrosive, though.
Here at Northwest Arbor-Culture, Inc., we have access to heavy-duty equipment like augers and hydrojetters that can kill tree roots in your sewer line without chemicals. Augers go into your pipes and cut off tree roots. They may grow back, though, so some homeowners choose to follow this with a foaming root killer like RootX. Hydrojetters clear obstructed pipes by blasting water through them, pushing out tree roots that have crept in. Both are ways to kill tree roots without chemicals.
If you want advice on how to kill tree roots naturally, with salt, in your sewer, or elsewhere, contact the Certified Arborists at Northwest Arbor-Culture, Inc. We would be happy to give you a free consultation about your tree. Call or email us today.
It’s summertime, and plants are growing. That means many of our trees need trimming. Find out why trimming is so important.
Once the trimming is done, it’s always a challenge to figure out what to do with the branches that get removed.
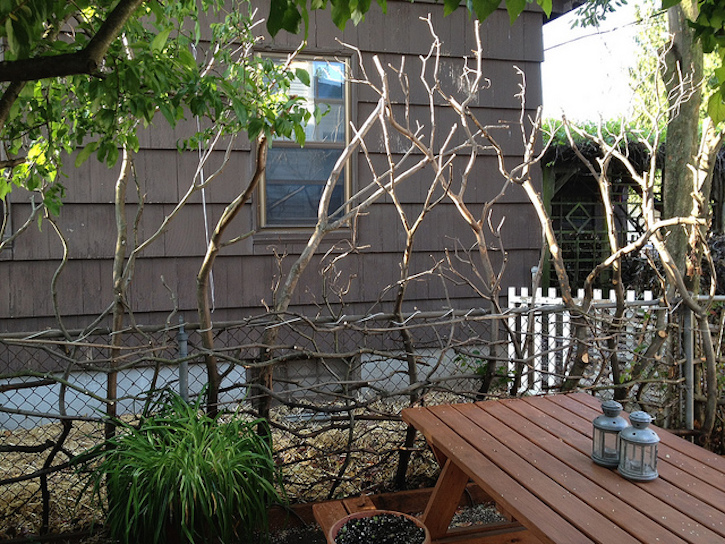
If being environmentally conscious is important to you (or you just like the look of rustic home decor) you can recycle tree branches as decorations for your home.
The easiest way to use tree branches to decorate is to simply put them where you want them! Try setting a branch on the mantel, leaning against a corner, or hanging it on the wall.
Try painting the branch white for a clean modern twist, or leave them as they are for a rustic look.
A picture frame can add a sophistication to an outdoorsy style. It’s easier to DIY than you might think. You can use wood glue or heavy duty staples to attach branches to the back of the frame.
Tree branches make great, one-of-a-kind curtain rods. It’s not a difficult project, but you’ll want to make sure you find a branch that’s sturdy enough to do the job. Choose a strong wood, like oak, pine, or cedar. Then check to make sure the branch is not going to bend or break easily before you put it up.
If you have an old chain link fence you don’t like, but don’t want to completely replace it, tree branches are an inexpensive way to add a bit of charm.
To hold larger branches in place, weave its smaller branches in and out of the chain link, like in the example above. Or just grab some string or ribbon to tie branches to the fence.
Room dividers that are transparent or have gaps are great for breaking up large spaces without completely cutting off one area.
Getting this look right is tricky if you’re trying to DIY. That doesn’t mean it can’t be done, though. And this slightly more rustic version looks like it could be an easier option.
A crisp, white branch like this one is great for a holiday display, especially when you include red elements like the ones on this table. A traditional rustic branch works year round, but is especially good for spring and summer, because it’s more relaxed and lends a casual farmhouse vibe.
Any kind of branch will work as long as you like the way it looks. Keep in mind that a single, not-too-heavy branch will be easiest to move next time you have a big meal and need to use the full table surface.
Thick branches make good candle holders. There are many ways to make them on your own. Single candle holders like the one above are ideal for bigger candles. For smaller ones, here’s a simple guide for making a row of candle holders from a single branch.
Whatever type of candle holder you choose, just make sure you use a flame retardant spray on the wood — just to be safe.
Recycling old tree branches as coasters isn’t just decorative, it’s practical. Slices of a large branch (or small log) are sturdy, attractive, and great for protecting delicate furniture from hot cups, beverage spills, and condensation from cold drinks.
Just make sure you slice the branch as straight and as cleanly as possible. The coaster needs to be level so your drinks don’t spill!
Tall, thin branches that have a little bit of a bend or an arch to them are perfect for hanging lamps like the one above.
You’ll want to make sure you secure the branch to the floor, to the wall, or to the side of a vertical cabinet or shelf. Depending on the branch and your design, you may also want to install small hooks to keep the lamp in place and hold the cord.
If you’re looking to add some delicate decoration to your home, using a tree branch as a decoration holder is a great (and easy) option. Hang book pages (as in the example above), family photos, old birthday cards, or other trinkets. It’s a visually appealing way to display anything with sentimental value and hold onto good memories.
If you’re interested in something a little more practical, try this cup holder idea.
Final Thoughts
Don’t be limited by these suggested ideas. There are hundreds of other ways to decorate with tree branches and put would-be wasted pieces of a tree to good use.
Make a reindeer during the holiday season or convert a big branch to a coat rack. Let your creativity guide you.
I hope these ideas inspired you and gave you a good use for your old tree branches.
How do you use tree branches to decorate your home? Tell us in the comments.
Are branches blocking your windows or walkways? Are you tired of that overgrown tree dropping twigs all over the yard? Or is an old tree simply growing out of control?
Residents of the Pacific Northwest are no strangers to tree woes.
With the right tools, you can solve many small tree problems with a little DIY pruning. (Save major tree issues for us professionals.) Trimming can keep trees healthy, add value to your property, and make you the envy of your neighbors.
But which tree pruning tools should you use? The best tree pruning tool for any job depends on how thick and high up the branches are, so I’ll talk more about that in this post.
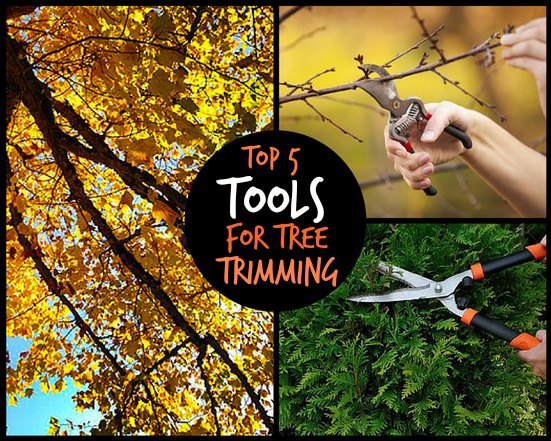
Here are 5 great options you’ll want to have in your tool shed:
1. Anvil Hand Pruning Shears
These small, hand-held shears have just one blade, which cuts as it closes onto a flat surface.
When to use them: Anvil shears are perfect for very small, easy-to-reach branches with a diameter of 1/2 inch or less. They are strong but tend to crush when they cut, so use them on dead branches and twigs rather than living ones.
2. Bypass Hand Pruning Shears
Unlike anvil pruners, bypass shears have two curved blades that cut by moving past each other like scissors.
When to use them: Bypass shears make more precise cuts than anvil shears. They are best for cutting living branches no thicker than 1/2 inch in diameter.
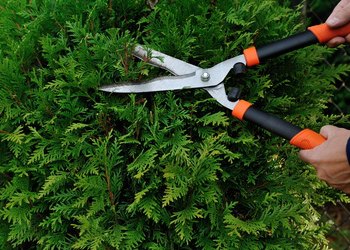
3. Loppers
Loppers are similar to hand shears, but they have longer handles, which give you more leverage for larger branches.
When to use them: Most loppers can tackle branches up to 2 inches in diameter. Use them for easy-to-reach branches that are just a little too thick for hand shears.
4. Combination Pole Saw Pruners
This amazingly versatile tool serves a huge variety of tree pruning needs. As you might have guessed, these long poles have both a saw and a shearing feature.
When to use them: Combination pole saw pruners are ideal for areas you can’t reach from the ground with other tools. The shearing feature is good for branches smaller than 1/2 inch, while the saw will work on thicker ones.
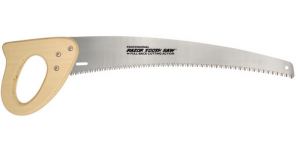
5. Pruning Saws
Pruning saws are one of arborists’ favorite tools. They are similar to traditional hand saws but specifically made for tree pruning.
When to use them: When a branch is within reach but loppers can’t handle it, a pruning saw might be your best bet. Pruning saws are great for branches about 1 1/2 inches thick or more.
Safety First
Unfortunately, DIY tree-trimming disasters do happen. Always wear gloves and eye protection, and if you’re planning on doing any serious pruning, you may want to invest in a hard hat to protect you from falling branches.
Even with the best tools, some tree problems are too big to tackle alone. That’s why we’re here. Certified arborists like us know how to safely deal with large projects or trees in danger of falling on people or property.
Are you concerned about the health or appearance of one of your trees?Contact us today and we can help.
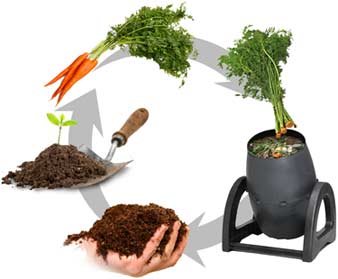
Landfills around the world are overflowing, and pretty soon we are going to run out of space for all that garbage! Luckily, many things we throw away can actually decompose in our backyards and even improve the soil in our gardens. Composting just might make your heirloom tomatoes grow bigger and juicier.
Composting also helps prevent soil erosion and runoff. Plus, it cuts down on the amount of methane produced by landfills and greenhouse gases produced by hauling garbage. Composting can reduce up to 30% of your household waste. Best of all, you can compost in your yard for free instead of spending money on chemical fertilizers.
How does composting help your yard? It acts as a soil conditioner, adding nutrients to your plants to keep the soil moisturized. It helps sandy soils retain water and loosens clay soils.
Adding compost stimulates healthy root development in plants and improves soil fertility. The organic materials in compost supply nutrients for microorganisms that keep the soil healthy and balanced. Feeding microorganisms naturally produces phosphorus, nitrogen and potassium. That means you don’t need to add any chemicals to your soil!
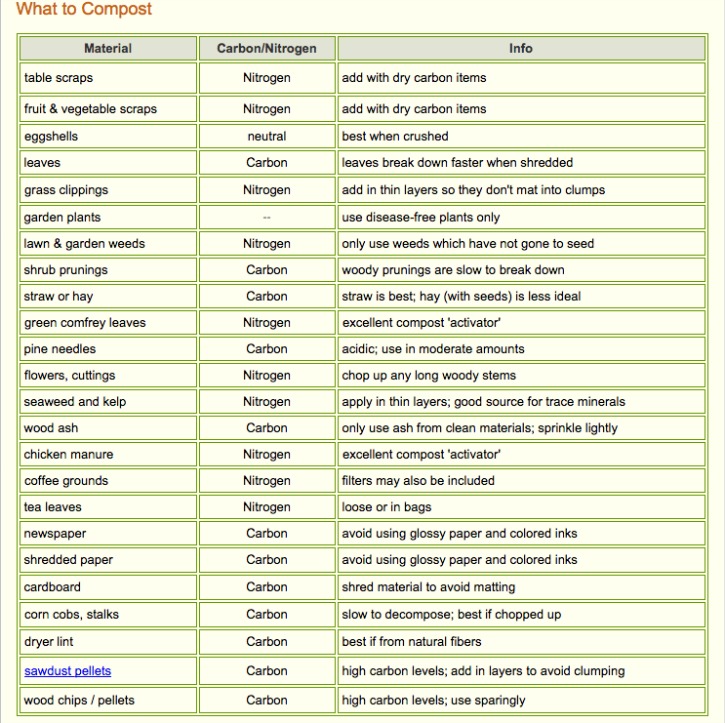
Below is a handy chart of things you can compost and how to do it. Source: eartheasy
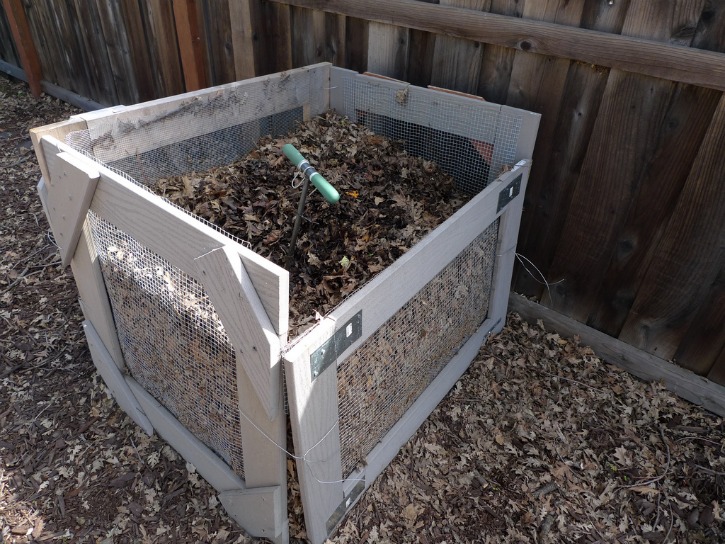
Begin with a container. You need some way to hold all of the decomposing material together so that the beneficial bacteria that breaks down the plant matter can heat up and do its job.
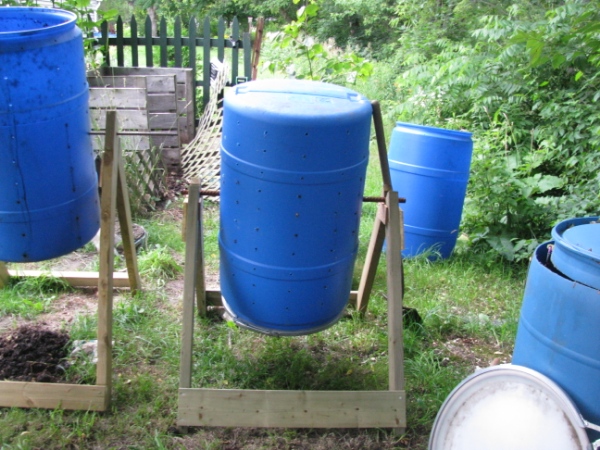
There are two types of compost bins: rotating and stationary. Both kinds need to have the contents periodically turned to combine the decaying matter and provide oxygen.
A stationary bin can be as easy as a wooden crate or a well-ventilated cage made from a wire fence. A well-designed bin allows for faster results by retaining moisture and heat. The downside to stationary bins is that they take longer to compost: usually several months or even years. If you’re going to go this route, place the pile in a sunny area so that it gets as much heat as possible. It will still decompose in a shaded area, but at a much slower rate, especially during freezing temperatures.
Compost tumblers are easy-to-turn bins that quicken the process. Instead of taking months or years, they do the job in just a few weeks. Heat retention and frequent oxygen infusions are what makes tumblers faster. Like stationary bins, you also want to put your compost tumbler in direct sunlight.


 Making sure your tree gets enough water is especially important when it’s young. Too little water can dry a tree out, while too much can drown it.
 Trees need their roots to absorb nutrients and even remain standing. Big trees have strong, sturdy roots, but even those roots can be damaged.
 Changing Colors
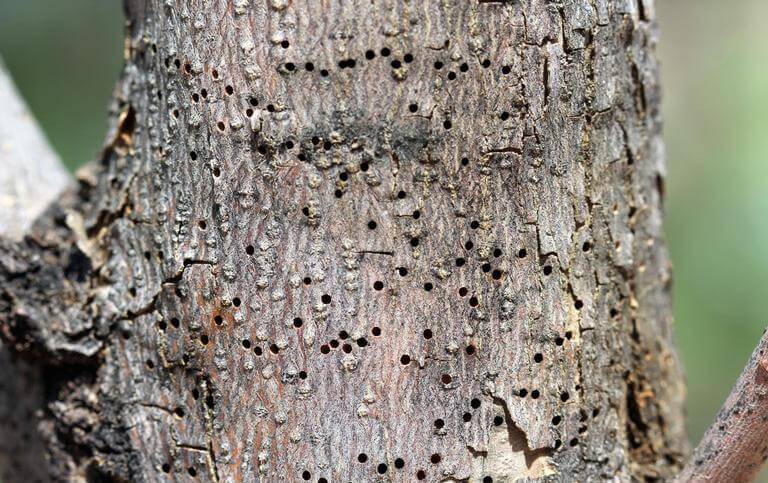


 The most common tree statewide is the Douglas fir
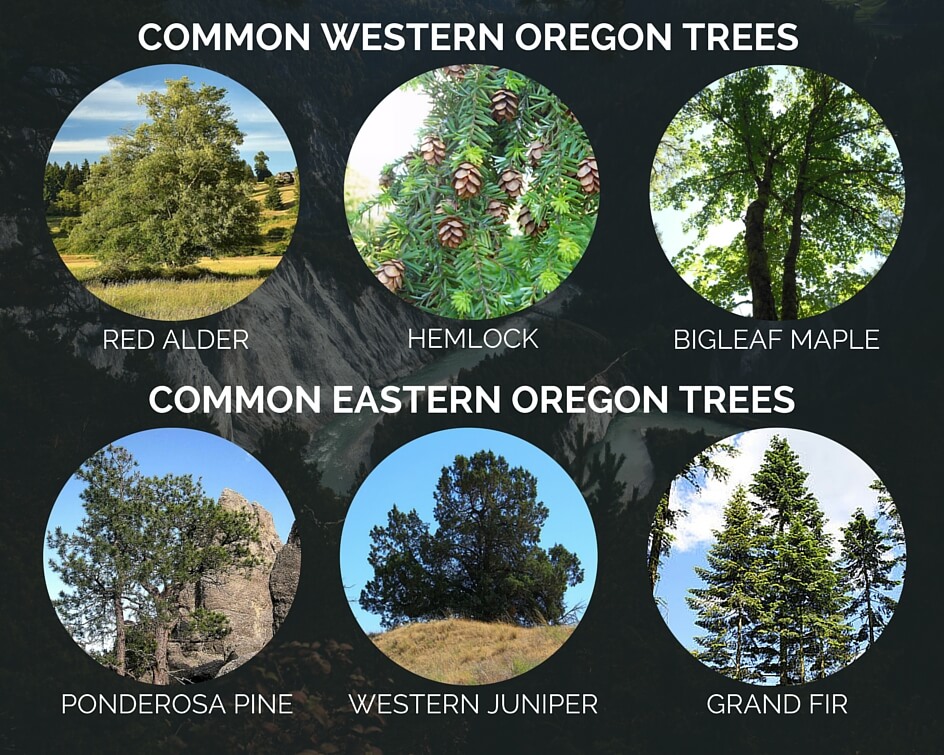


 Here’s what you’ll want to have handy:
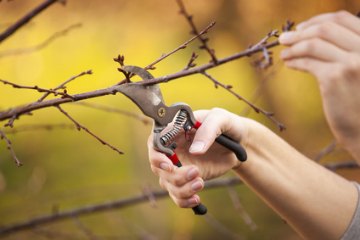


 You’ll Need:


 Published
 flushing rock salt or copper sulfate down the toilet. Copper sulfate in particular is very corrosive, though.


 like anvil pruners,

 They are similar to traditional hand saws but specifically made for tree pruning.
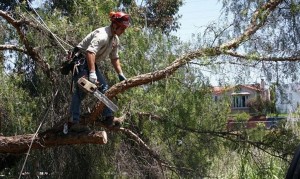
 wing, and pretty soon we are going to run out of space for all that garbage! Luckily, many things we throw away can actually decompose in our backyards and even improve the soil in our gardens. Composting just might make your heirloom tomatoes grow bigger and juicier.