Trees provide shade, help freshen the air, and even add value to your property. We all want our trees to stay strong and healthy, but what should you do if you think one of your trees might be dead?
Dead trees don’t just look unattractive, they can actually pose a safety risk. Dead trees are more fragile. They drop branches easily and may even fall completely if not taken care of properly.
Today, I’ll show you how to tell if your tree is dead, and what you can do to keep your home, property, and family safe.
What Causes Trees to Die?
Trees live hundreds of years, right?
Many of them can, but damage and diseases can unfortunately kill a tree prematurely. In an ideal world, you’d notice the warning signs early on.
When a tree is dying, the cause of the problem usually starts underground with the roots and soil. Luckily, you can often see signs of tree death and disease above ground.
Here are some of the most common reasons why trees die:
Too Much or Too Little Water
Making sure your tree gets enough water is especially important when it’s young. Too little water can dry a tree out, while too much can drown it.
How much water your tree needs depends on the type of tree you have and where you live. The Arbor Day Foundation has some helpful tips for how much to water your tree at each stage of its growth.
Contact your local certified arborist if you have more questions about how to water your tree.
Changes in the Soil Grade
Changes in the soil level around your tree can affect how much water and nutrients the tree can absorb. That’s because trees’ primary feeding roots are usually located in the top six inches of soil. Changing the soil grade by even just a few inches can create a problem.
If you’re thinking of adding soil to your yard, be careful. Avoid adding too much near your tree if you can.
Root Damage
Trees need their roots to absorb nutrients and even remain standing. Big trees have strong, sturdy roots, but even those roots can be damaged.
If you have frequently driven over or parked on a tree’s roots, there’s a chance they were damaged.
Not only can the weight of a car damage roots, but all that weight also compacts the soil beneath it, making it harder for the tree to get the water, oxygen, and other nutrients it needs from the soil.
Pouring concrete, laying asphalt, or paving over tree roots can cause similar problems. If tree roots don’t have room to grow, or something is preventing them from feed from the soil, you may have a problem.
Improper Planting or Transplanting
Young trees are especially sensitive, so planting and transplanting them can be risky. A couple common mistakes are:
Digging a too shallow or too deep hole
Packing the soil down too hard after planting
Both can smother the tree and prevent proper root growth.
Tip: Any time you plant or transplant a tree, be careful of the root ball (the tangle of roots at the bottom of a young tree). If there is burlap or twine tied around the roots, remove it carefully. Then, gently loosen and separate the root ball just enough to help the roots spread out before you place the tree in the ground.
The warning signs will be slightly different depending on what type of tree you’re dealing with. Usually, though, you’ll be able to tell if there’s something wrong.
What should you look for?
Falling Leaves or Needles
A tree that is dying or dead often loses its leaves or needles very quickly and suddenly. Or it has no foliage whatsoever, even during a time of year when it should.
Changing Colors
Unexplained discoloration of the foliage is another common sign of stress or disease — usually one of the first ones you’ll notice.
Brown, multi-colored needles are a common sign of sickness in conifer trees.
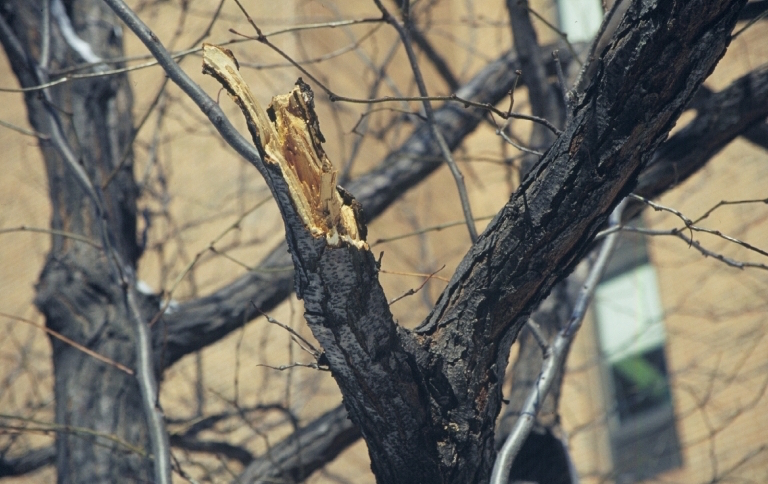
Cracks and Splits
Big cracks or splits in the structure of the tree can be a sign that the tree is dead, especially if other warning signs are also present or if the crack is in the trunk.
Changing Bark
A strange or different bark texture can also spell trouble. Tree bark is often a good indicator of the tree’s overall health. If bark is missing, loose, dry, or brittle, be concerned. When branches lose their bark, it means those branches are most likely dead.
Infections and Infestations
Animals and fungi often start taking over dead trees too. Fungus usually only grows on decaying wood, so keep an eye out for mushrooms!
Insects like carpenter ants and beetles often set up camp in dead wood too. Look for rows of small holes in the wood or places where wood has clearly been eaten away:
A weak or spongy trunk can be a sign that a tree is rotting from the inside. If you notice this, call your local certified arborist right away. Rotting in the trunk is a sign that your tree may no longer be stable. You’ll want to get it taken care of before branches start falling, or worse, the whole tree comes down.
What Can I Do if My Tree Is Dead?
If your tree is dead, your best option is to have a professional come and remove it safely. If it’s a large or precariously positioned tree, you’ll want to do this as soon as possible.
If your tree is simply old, sick, or just unstable, you may have other options besides tree removal, such as cabling and bracing. Depending on the cause and extent of the damage, you might be able to salvage your tree or at least increase its life.
No matter what state your tree is in, an arborist, like us at Northwest Arbor Culture, can help you determine the best course of action for keeping your home safe and beautiful.
If it turns out your tree needs to be removed, we can help. We’ll even get rid of the stump for you! With over 30 years of landscaping experience, we can also help you decide what to do with the empty space or help you reconfigure your entire yard if you like!
If you’re worried about one of your trees, don’t wait until it’s too late.
Curious about a tree on your property? Or just want to impress your friends next time you go hiking?
Today, we’ll be talking about Tree Identification 101: how the experts identify trees and the features they look for.
I’ll also show you an easy tree identification tool anyone can use in Oregon.
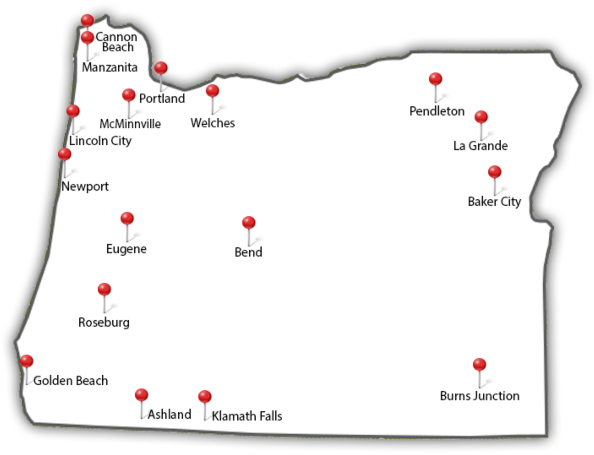
First, let’s look at a few of Oregon’s most common trees.
Trees You’ll See in Oregon
Oregon is a big state with a diverse climate. Some trees grow really well in western Oregon but not eastern Oregon, and vice versa.
The most common tree statewide is the Douglas fir, Oregon’s state tree. It’s by far the most common tree species in western Oregon, but it’s easy to find them in eastern Oregon too.
The Douglas fir is characterized by blunt green pine needles and 3-4” pine cones with pitchfork-shaped brackets.
Use this great resource from Oregon State University to check out more of the most common trees in Oregon.
Did you recognize your tree as one of those? If not, or if you want to be sure, keep reading!
Let’s look at the tree identification process and how the experts use it.
How Do Experts Identify Trees?
Oregon is home to so many different species of trees that it takes a lot of practice to learn to identify trees by sight alone. Even tree experts often refer to tree guides.
When experts want to identify a tree, the first thing they look at is its leaves. The shape, size, spacing, and even color of a tree’s leaves can tell you a lot.
Tree Features to Look For
When you examine a tree’s leaves, what should you look for? In a minute, I’ll show you a free, comprehensive tree identification tool you can use to go through the examination process step by step. But first, let’s see the three main features most tree identification guides will ask you to look at.
Conifers vs. Broadleaves
This is step one. Pretty much all Oregon trees can be split into two big categories: conifers and broadleaves.
Conifers are evergreens. They often bear cones and have leaves that look like needles or scales. Broadleaves are deciduous (not evergreen) trees. They have flat, thin leaves and shed them in the winter. Unlike conifers, broadleaves often grow flowers or fruit too.
So, the first step in tree identification is to check whether the leaves are needle-like, scaled, or flat and thin.
Spacing of Leaves
The spacing of leaves tells you a lot too. If you’re dealing with a conifer, are the needles fairly evenly spaced along the branch, or are they bunched together in a clump or a fan-like shape? How many needles are in a clump?
You can look for the same pattern with broadleaves. Are the leaves compounded (lots of leaves fanning out from a single twig) or are they simple (single leaves sticking off of twigs or small branches)? See the difference here. Do they alternate along either side of the branch or are they exactly opposite each other?
Answering those questions will help you narrow down your search so you can get closer to identifying your tree!
Shape of Leaves
Finally, look at the shape of the individual leaves. If it’s a conifer with needle-like leaves, how long are the needles? Do they have little pegs or buds on them? Do the needles have different colors?
If it’s a broadleaf, what are the leaves shaped like? Do they have lobes or are they basically oval? Are their edges smooth or jagged? Are they thick and leathery or thin and delicate? Are their undersides a different color? And what kind of fruit accompanies the leaves, if any?
Now you know the basics, you’re ready to use an identification tool to find out the exact species of your tree!
Using a Dichotomous Key
Dichotomous means split into two. A dichotomous tree identification key is a tool that lets you identify a tree by making a series of choices between two alternatives.
You’ll start by telling the key whether your tree is a conifer or a broadleaf. Then you’ll move on to more specific questions from there.
Here’s what you’ll want to have handy:
Access to the internet
A ruler
The ability to get up close to the tree you want to identify
Now it’s time to get up close to the tree. If you can, take your tablet, phone, or laptop out to look at the tree, and go through the steps there.
If that’s not possible, take several detailed pictures of the tree before you start using the key. Make sure you get good close up pictures of the tree’s needles and leaves. Take some basic measurements of individual needles or leaves to get a sense for how big they are.
It’s that easy! Just make sure you’re certain about every choice you make before you move on to the next one.
What’s Your Tree?
Are you planning to try the key? Did you already identify your tree? Let us know what kind of tree you identified! And if you ever have questions about the health or safety of any of your trees, give us a call!
Want to learn more about tree identification? Check out these resources:
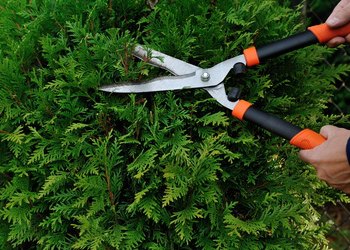
Tree pruning is healthy. Think of it as a haircut — you’re not hurting the plant, just keeping things in the best shape and paving the way for future growth. But you don’t want to disfigure your shrubs. Misguided hacks can prevent your tree from blossoming that year. Consider this your quick guide to the best time of year for tree pruning and shrub trimming.
First, an important note: Dead branches, those in the way of pedestrians, and those that could damage your property can be removed anytime. Don’t wait with a dangerous situation. If you have a tree emergency, you can call us 24 hours a day at 503-538-8733.
When to Prune Trees: Winter
Overall, the best time to prune your trees is when they’re dormant, so late winter to early spring is ideal. (In fact, that’s the only time to prune birch trees and American elms.) For shade trees like ash and oak, winter is the perfect time. Deciduous fruit trees like apples, cherries, and pears should also be pruned in midwinter.
Oregon State University horticulturist Ross Penhallegon agrees. “November through March is a good time to prune,” he says. “If you are worried about winter freeze damage, wait until after Feb. 1, which is the best time to prune in western Oregon, and March 15 east of the Cascade Mountains.” Not only is it less traumatizing to the tree, but it’s easier to see the tree’s structure without all of its leaves. Fall isn’t too early to contact your arborist and set up an appointment for the months ahead.
When Not to Prune
Don’t wait too late! In general, you want to avoid pruning trees during late spring and early summer. That’s when everything is starting to bloom. Trees don’t have enough of a chance to heal before the growing season if you prune them too late. The burst of energy plants get in the spring will help heal small cuts made in the previous months.
If a tree already has leaves, don’t attack them too much — that’s where photosynthesis is happening and where the tree is getting its food. Not enough leaves mean not enough energy sources. Think of leaves as little, flat green batteries that keep the tree running.
Fall is also usually not the best time to prune. Cuts seem to heal more slowly during the fall, and pests or fungi can easily prey on plants. As Oregon State University says, “Pruning during the spring (post-dormancy) and fall (pre-dormancy) is generally the least desirable time as the plant is most vulnerable during those times.” Try to be patient and wait for trees and shrubs to be fully dormant before trimming them.
Although late winter and early spring is generally the best time to trim trees, some have different timelines. Read on for the intricacies of pruning.
When to Prune Flowering Shrubs and Trees
The main determining factor for pruning shrubs is whether they flower on old wood or new wood. Does your shrub blossom in early spring, on old wood from last season? The best time to prune them is right after they bloom.
If your shrub flowers on new wood — it’s a late bloomer, so to speak — the blossoms grow on the current season’s growth instead of last season’s. That means you’re fine to prune these shrubs in late winter to early spring, because you won’t be harming the blossoms yet.
Here’s a handy chart:
Old Wood
Most Plants & Shrubs
New Wood & Broadleaf Evergreens
Blossom time:
Early spring
Spring
Late spring
Best to prune:
After they bloom (early summer)
Winter
Late winter to early spring
Examples:
Lilacs
Shrubs grown primarily for their foliage
Lavender
Rhododendrons
Deciduous shade trees
Roses (mid-February to early March in the Willamette Valley)
Suckers and water sprouts are unproductive offshoots that steal nutrients from the main stem or trunk. They aren’t harmful, but they can be annoying. This is one of the rare times when you shouldn’t take to the pruning shears in the winter, during the dormant season, because that will make water sprouts and suckers come back with a vengeance the next spring. Instead, clip suckers and sprouts in the early summer months of May and June.
Check out this 30-second video about pruning suckers and sprouts:
Is My Tree Bleeding?
When you prune certain trees like maples, birches, and walnuts, they’ll ooze sap. This potentially disturbing sight is trees’ version of bleeding — except they aren’t hurt. In fact, this is completely normal. Once leaves start to grow, the sap will stop flowing.
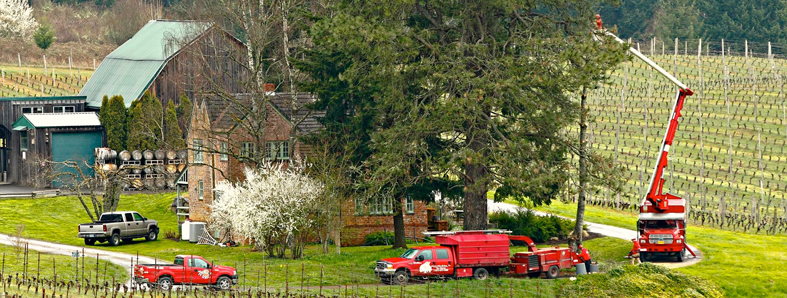
Why Hire a Certified Arborist for Tree Trimming?
After reading all this, you might feel ready to head out back with your shears and do some trimming. Whoa there, Nelly! I admire your enthusiasm. Unless you’re experienced and quite knowledgeable about trimming and pruning, it’s best to hire an ISA-Certified Arborist® like us at Northwest Arbor-Culture, because we know how to trim your tree or shrub without topping or making dangerous cuts that leave your plant vulnerable to infection.
It’s already September, so it’s never too early to set up an appointment for tree trimming this winter! Call us today at 503.538.8733 or fill out our online form for a free quote.
Building a treehouse is a fun and time-consuming process—especially if you’ve never built one before. They come in all shapes and sizes, from small tree forts to giant luxury hideaways.
In this post, I’ll show you how to build one type of simple backyard treehouse, but I’ll offer plenty of resources along the way for those of you with more ambitious plans.
No matter what kind of treehouse you want, safety is your first priority. If you’re not confident with your building skills or you want an elaborate design, consult a professional treehouse builder, such as Nelson Treehouse and Supply in Washington State.
Have an arborist come out to make sure your tree is safe. Don’t hesitate to call us if you have questions about the safety of any of your trees.
Step 2: Plan Your Treehouse
You’ll Need:
Cardboard and duct tape or a pencil and paper
Every treehouse is different because every tree is unique. Examine your tree for quirks, like a strangely shaped trunk or oddly positioned branches, and plan around them.
Then make a detailed sketch or cardboard prototype of your treehouse. Be sure to include measurements.
You can borrow one of these free treehouse plans or even design your own. And these fun and crazy ideas are sure to spark your creativity.
You want to make your platform strong, level, and not higher than 5 or 6 feet off the ground if kids will be using it.
If this is you first treehouse, WikiHow has good step-by-step instructions on this part. (Note that you’ll be using Garnier limbs, a type of treehouse attachment bolt, instead of the galvanized lag screws they suggest.) For now, I’ll give you a quick explanation.
First, place the 2x10s parallel to each other on either side of the two branches that separate into a V shape, but don’t attach them yet. This is just to help you mark where you want the Garnier limbs, which will be your main support.
Pre-drill into the tree, and then install the Garnier limbs. Find more detailed information on how to safely insert them here.
Now use the metal brackets and screws to attach the 2x10s to each of the Garnier limbs.
This method works great for most people, but every tree is different. To be completely sure your treehouse is safe, ask an engineer to take a look at your plan, and read up on treehouse support safety here.
Step 4: Brace the Platform
You’ll Need:
At least two strong boards (The number and length will depend on the size and shape of your tree and platform.)
Nail the boards to the platform and use Garnier limb standard knee braces to attach them to the tree, like Nelson Treehouse and Supply did with this bold structure.
Important: Depending on the strength of your materials and the weight of your treehouse, you may need to add extra support beams in the ground. I recommend consulting a contractor or professional builder unless you’re absolutely sure.
Use screws to attach the floor to the platform. You may have to do some cutting and sanding to make sure your floor fits nicely around branches.
Step 6: Attach Handrails
You’ll Need:
Enough 2×4 boards to build rails around the entire treehouse except the entrance
Nails
Screws (at least 3”)
You’ll want at least two 2x4s standing vertically in each corner of your treehouse. Screw them to the platform. Use nails to attach the rest of the 2x4s horizontally across the top.
Fill the space between handrails and the platform to stop small treehouse dwellers from falling out. You can use boards, mesh, or plywood sheets.
If you want to build walls instead of just handrails, get some tips from this family.
Step 7: Build Your Access Ladder
You’ll Need:
Several 2-foot long pieces of 2×4
Two long 2x4s
Screws (2.5”)
eHow has great instructions on building a treehouse ladder. Here’s what they suggest:
Find an open space to lay the long 2x4s on the ground parallel to each other.
Start at the base by placing a 2-foot board between them at least six inches from the bottom. Drive three screws through each long 2×4 and into the ends of the 2-foot board. Make sure the small boards will be level and easy to step on when the ladder stands up.
Repeat the same process at the top, again placing the 2-foot board six inches down. Add the rest the same way, making sure they are evenly spaced.
Stain or paint the wood, add a simple roof, or have your family carve their initials into the handrails. Whatever you want! If you live in a damp area, also think about waterproofing your treehouse.
No matter what kind of treehouse you build, have fun and be safe. And share your fond treehouse memories in the comments!
For advice about whether your tree is strong enough, or any other tree questions, call our Certified Arborists at 503-538-8733.
Most of the time, you want tree roots to thrive. But if you’re removing a tree and don’t want regrowth, or if tree roots are dangerously close to something underground, you may need to kill them. It’s something we handle here at Northwest Arbor-Culture, Inc., and some homeowners like to DIY as well. Here’s a basic primer on how to kill tree roots.
How to Kill Tree Roots Naturally, Without Chemicals
An easy way to kill tree roots is to spray chemicals like hexazinone or bromacil onto the soil above, then wait for rain to push the chemicals down to the roots and kill them. But here in the Northwest, we’re pretty eco-conscious, and a lot of folks don’t want to use harsh chemicals. They can leach into our water supply, after all. So here are three ideas for how to kill tree roots naturally.
First, a little education. Trees use their bark to transport water and nutrients from the roots up to the rest of the tree. Girdling is a technique where you cut off the outer layer of bark, making it impossible for the tree to feed itself. The tree and roots will eventually die. This method is natural, but it can take several years if the tree is big. (That’s because trees can store lots of nutrients in their roots, like a backup supply of food.)
If you try girdling, cut the tree bark and treat the cut with undiluted white vinegar. (Substitute herbicide for vinegar if you aren’t as concerned about how to kill tree roots naturally.) If you don’t apply vinegar or an herbicide to the tree wound, you may get suckers, or small offshoots, as the tree creates new growth. Remember, different types of trees will react differently to girdling. If the sapwood is quite thick, it will take longer for the tree to die.
Paving or mulching on top of your tree roots will also kill them. (You’ll need at least six inches of mulch.) Without sufficient air, the roots will die, and so will the rest of the tree afterward. Like girdling, these methods take a while before they are effective.
How to Kill Tree Roots with Salt
Much like suffocating roots by mulching, you can cut off roots’ water supply and they will essentially die of thirst. Rock salt will accomplish this. When you apply salt to tree roots, it absorbs all the water, leaving none to nourish the tree. Let me warn you, though, that salt doesn’t discriminate. It will also kill your nearby plants and grass, so be careful.
How to Kill Tree Roots in Sewer Line
Trees love plumbing because it gives them a steady supply of water. Some people opt for chemical treatments if they discover tree roots in their sewer line. Adding chemicals to your toilet bowl will eventually reach the tree roots in your sewer line and kill them. However, some people don’t want to add chemicals to the water supply. I’ve also heard homeowners try to kill tree roots in their sewer line by flushing rock salt or copper sulfate down the toilet. Copper sulfate in particular is very corrosive, though.
Here at Northwest Arbor-Culture, Inc., we have access to heavy-duty equipment like augers and hydrojetters that can kill tree roots in your sewer line without chemicals. Augers go into your pipes and cut off tree roots. They may grow back, though, so some homeowners choose to follow this with a foaming root killer like RootX. Hydrojetters clear obstructed pipes by blasting water through them, pushing out tree roots that have crept in. Both are ways to kill tree roots without chemicals.
If you want advice on how to kill tree roots naturally, with salt, in your sewer, or elsewhere, contact the Certified Arborists at Northwest Arbor-Culture, Inc. We would be happy to give you a free consultation about your tree. Call or email us today.
Landfills around the world are overflowing, and pretty soon we are going to run out of space for all that garbage! Luckily, many things we throw away can actually decompose in our backyards and even improve the soil in our gardens. Composting just might make your heirloom tomatoes grow bigger and juicier.
Composting also helps prevent soil erosion and runoff. Plus, it cuts down on the amount of methane produced by landfills and greenhouse gases produced by hauling garbage. Composting can reduce up to 30% of your household waste. Best of all, you can compost in your yard for free instead of spending money on chemical fertilizers.
How does composting help your yard? It acts as a soil conditioner, adding nutrients to your plants to keep the soil moisturized. It helps sandy soils retain water and loosens clay soils.
Adding compost stimulates healthy root development in plants and improves soil fertility. The organic materials in compost supply nutrients for microorganisms that keep the soil healthy and balanced. Feeding microorganisms naturally produces phosphorus, nitrogen and potassium. That means you don’t need to add any chemicals to your soil!
Below is a handy chart of things you can compost and how to do it. Source: eartheasy
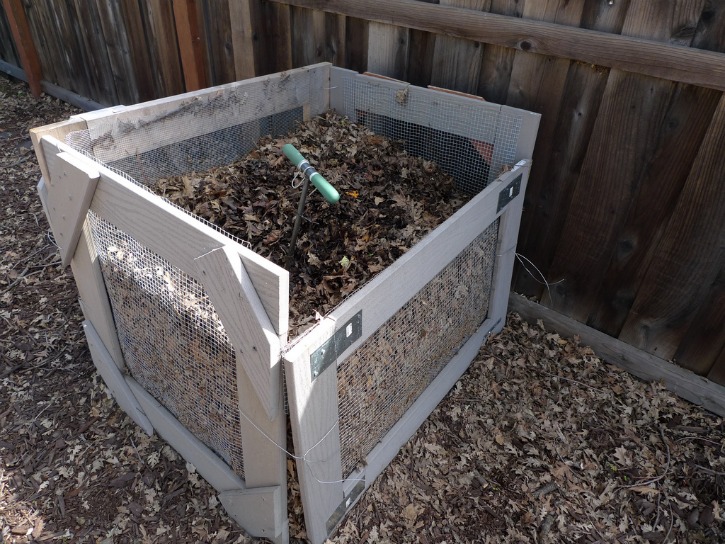
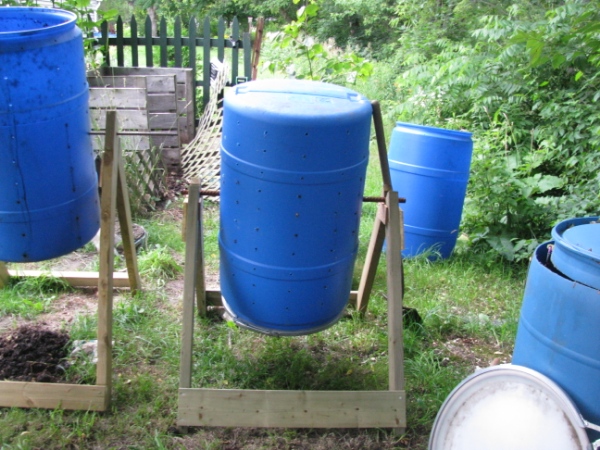
Begin with a container. You need some way to hold all of the decomposing material together so that the beneficial bacteria that breaks down the plant matter can heat up and do its job.
There are two types of compost bins: rotating and stationary. Both kinds need to have the contents periodically turned to combine the decaying matter and provide oxygen.
A stationary bin can be as easy as a wooden crate or a well-ventilated cage made from a wire fence. A well-designed bin allows for faster results by retaining moisture and heat. The downside to stationary bins is that they take longer to compost: usually several months or even years. If you’re going to go this route, place the pile in a sunny area so that it gets as much heat as possible. It will still decompose in a shaded area, but at a much slower rate, especially during freezing temperatures.
Compost tumblers are easy-to-turn bins that quicken the process. Instead of taking months or years, they do the job in just a few weeks. Heat retention and frequent oxygen infusions are what makes tumblers faster. Like stationary bins, you also want to put your compost tumbler in direct sunlight.
Not only does capturing rainwater help the environment by conserving resources, it also saves money. Depending on how much it rains where you live and the size of your house, you can accumulate a significant amount of water with a simple arrangement. During the summer, a rain barrel can save homeowners about 1,300 gallons of water. This extra water you save can really make a notable difference in your water bill.
Rainwater collected from rain barrels picks up very little contamination because it is gathered from the roofs of houses. Having a roof free of contaminants and debris will ensure that your harvested water is pure. The amount of contamination the water contains also depends on your roofing materials. The hard water and chemicals from the municipal water systems can cause an imbalance of the soil in your yard. This imbalance can make your plants and trees become weak and more susceptible to disease.
Water Shortage
Approximately one in nine people don’t have access to an improved water source. According to Business Insider, 1.2 billion people worldwide live in areas that have inadequate water supply. By 2025, two-thirds of the world will live under conditions of water shortage.
Meanwhile, an American taking a five-minute shower uses more water than the average person in a developing country slum uses for an entire day. And many of us take longer showers than that!
Many areas in the United States are experiencing a threat to their safe and steady water supply. This is partially because people are using drinking water to flush the toilet, water plants, and for landscape irrigation. If people used harvested rainwater for those things, it would really make a difference for the planet.
Rainwater is an economical water source that can be used outdoors with hardly any treatment. Capturing rainwater also helps prevent urban flooding and surface water pollution because it reduces runoff that would otherwise pour into storm water flows.
Even if you live in a dry, sunny location like southern California, reusing rainwater can make a considerable dent in your water usage. In the summertime, watering gardens, flowers and lawns can add up to as much as 40 percent of water use.
What Can You Use Rainwater for?
Unless you have a special filtration system in place, it’s best not to drink rain barrel water. Store-bought rain barrels are often marked with labels saying they are for “non-potable water” (not for drinking) uses only. To keep your harvested water clean, make sure your roofing materials are metal and/or stainless steel, and don’t use zinc strips on your roof.
You can use the water collected in your rain barrel to wash your car, water plants, or top a swimming pool during a drought. Rainwater is ideal for these purposes because it doesn’t contain any lime, chlorine, or calcium.
If you want to salvage water from your downspout, place your rain barrel close to a downspout from your rain gutter.
Downspouts are usually attached to the house with straps and will need to be taken apart. Remove the screws that hold the straps to the downspout and any screws that might have been put in to attach the spout to the gutter. The downspout can be removed and set aside after the brackets have been removed. Remember to use safety glasses if you are using power equipment when you remove the screws and detach the downspout!
Once the downspout is removed, you must redirect the flow of water into the top of the rain barrel. It is imperative that the concentrated water flow is directed into the barrel or away from your house. Too much water in one place near your house could cause foundation damage. It’s not a good idea to let the water simply fall from the gutter into the barrel.
You should put your rain barrel on a secure and stable surface, like a wide concrete block. The barrel will be heavy when it fills up with water (water weighs about eight pounds per gallon).
If you get around 10 inches of rainfall during the spring and summer, an average 1,360-square-foot roof would yield 8,160 gallons of rainwater. Not bad!
It’s time for tea, and we’re not talking about chamomile.
Compost tea is a healthy drink for your plants or lawn. It can be a great way to spruce up any parts of your yard that are looking a little sad. In this guide, we reveal some of our expert compost tea tips that will make your garden healthy and your neighbors jealous.
Arborists know that adding compost to soil can increase the minerals and nutrients available to your plants. This is like plant food – it helps your plants grow big and strong. Compost also contains bacteria and fungi that help protect plants from disease and infection.
But compost can be arduous to spread. Sometimes what seems like a large amount can be surprisingly little – not enough to give your plants the nutrients they need.
That’s where ‘compost tea’ comes into the mix.
Making compost tea is simple. The process is very similar to making actual tea. You can spread it over large areas, covering plants with microorganisms that fight the spread of plant diseases and improve the health of your plants.
What is ‘Compost Tea’?
“Compost tea is a liquid extract of compost that contains plant growth compounds and beneficial microorganisms.”
Agriculturists have used liquid extracts and fertilizers for hundreds of years. Solid compost is a great source of beneficial nutrients, but you can only mix it with the soil. This forces the plant to create its own ‘protective barrier’ of microorganisms on its foliage.
Compost is also difficult to spread over large areas. For the homeowner wanting to fertilize their lawn or trees, it isn’t always the best choice.
Compost tea is the solution to these problems. It allows agriculturists to take the best parts from compost and put them in liquid form. You can easily spray that liquid over an entire plant or lawn.
Generally speaking, there are two types of compost tea: aerated and non-aerated. While we want you to become a compost tea expert, we’re going to take baby steps.
Making aerated compost tea gets complicated (and expensive). For the sake of learning, this post will focus on the simplest method of making compost tea.
Making Farmer’s Tea (Non-aerated Compost Tea)
The process of making Farmer’s Tea resembles that of brewing actual tea. Like the name implies, you make non-aerated compost tea by ‘steeping’ or soaking compost in water.
While your compost is soaking, you’ll need to stir and agitate it by hand. This introduces air into the mixture, allowing colonies of good bacteria, fungi, and yeast to grow in the liquid.
Once the water is saturated with beneficial nutrients and fermented with microorganisms, you want to strain it into a spraying device and apply it to your plants.
That’s an overview of the whole process – start to finish. Now we’ll cover each step in more detail.
Materials Needed
You can pick up all these materials at your local nursery or garden shop.
Two 5 gallon buckets
Water source (not chlorinated) *
Ready-to-use compost (organic and not entirely manure-based) **
Stick or tool for stirring
Burlap sack or a large knit cloth bag
Handheld spray bottle or garden sprayer for application
* Do not use chlorinated water. It will kill the organisms in your tea and contaminate your plants.
** The most important ingredient in your compost tea is the compost. Quality compost contains thriving colonies of microorganisms and helpful plant nutrients. If you start with quality compost, you’ll make a quali-TEA. That is, a quality tea.
Avoid using animal manure compost. These composts don’t contain the same amount of microbial colonies as organic compost. It can also contain E-Coli and other harmful human pathogens.
Step 1
Make sure that your equipment is clean and free of contaminants like pesticides and chemicals. These can kill helpful microorganisms and contaminate your plants.
Step 2
Fill your bucket about half full of compost.
Step 3
Pour water on top of the compost until the bucket is nearly full to the top with water.
Step 4
Let your compost soak in the bucket for at least one day. Some people like to brew their tea for an entire month, but one to eight days is a sufficient amount of time.
You should agitate the mixture with your stirring tool at least twice a day. Stirring introduces oxygen into your liquid and helps bring nutrients into solution. The more often you stir your fermenting tea, the quicker and stronger the beneficial microorganism colonies should grow in your tea.
Note: If you are brewing your tea on a hot day, make sure that you are stirring more often (once an hour). You also want to keep your mixture out of direct sunlight and harmful UV rays.
Step 5
Once your tea has been brewed you should strain the particles out of the solution. For this part of the process, you’ll use your burlap sack or any type of large knit cheesecloth-like material.
Pour the mixture through the cloth into the second 5 gallon bucket. You can reuse the separated compost particles as a soil amender, or throw them into a compost pile.
Using Your Compost Tea
Now that you have successfully brewed and strained your batch of compost tea, you should be left with a particle free, amber colored liquid. If your liquid is very dark, it may be too concentrated and can be diluted by adding extra water until a lighter color is achieved.
Fill your clean handheld spray bottle or garden sprayer with compost tea and water. A general guide to tea dilution is as follows:
For house plants use a 1:1 (tea to water ratio)
For larger areas like lawns or trees use a 1:3 (tea to water ratio)
As you begin applying your protective brew teaming with microorganisms to your plants observe the health of the plant to guide how much tea you spray. Sick plants will generally need larger amounts of tea than healthy plants.
When Should You Spray? And How Much?
Whenever you see signs of disease or undernourishment these are good indicators that your plants may need a dose of compost tea.
Undernourished plants may have yellowing leaves, stunted growth and smaller than normal flowers or fruits. Signs of a fungal disease include wilting foliage, failure to flower or bear fruit, and discolored leaves. Pest problems and other diseases produce many of these symptoms as well.
To use your compost tea, you can spray it on plant foliage (leaves), spray or soak the soil around a plant, or even treat seedlings by dipping their roots into compost tea before planting them.
Medium houseplants require about 2 cups of tea each treatment. For lawns apply tea once or twice a month during growing season, just before or just after regular watering. One gallon of compost tea mixture covers about 1,000 square feet.
If you are seeing signs of disease or undernourishment spray at least once a month, or as often as every other week. If you have healthy plants, spraying once or twice a season can still be beneficial.
Note: Do not spray your plants in direct sunlight or excessive heat. UV rays and extreme temperatures can damage your compost tea.
You may not see immediate changes in your plant health, but be patient. It takes some time for the beneficial microorganisms to grow and proliferate around and on the plant.
Storing Compost Tea
You can only keep and use compost tea for several days after decanting from the original brew.
Compost tea does not keep well for long periods of time because the living microorganisms in the solution will quickly ‘eat’ all of the available food and eventually die. By storing compost tea properly, you can help it stay ‘good’ for several days after decanting.
Store compost tea away from direct sunlight and harmful UV rays. Also, make sure to keep your tea away from extreme temperatures (between 60-90 degrees F).
Do not store your brew in a closed container. Natural biological and chemical reactions can create pressure and cause a sealed container to burst.
Cautions With Compost Tea
Do not apply compost tea to any vegetable within 3 weeks of the planned harvest date. Compost tea can contain some human pathogens and should not be ingested or introduced into the body.
Also, not fully matured compost can contain E. coli. Make sure your compost is fully broken down to help ensure that no unwanted pathogens are introduced into your compost tea.
Creating quality, fully matured compost is a very complex subject that we will explore in a different post. Until then, here is a link to making quality compost.
Beautiful Blooms & Green Gardens
Now that you know how to brew amazing compost tea and properly spray your struggling plants, all you have left to do is sit back and enjoy the fruits of your labor.
Soon you will have jealous neighbors complimenting your gardening prowess and begging for your growing secrets.
Have you ever made compost tea before? We’d love to hear about your personal tea recipes and success stories in the comments section.


 Making sure your tree gets enough water is especially important when it’s young. Too little water can dry a tree out, while too much can drown it.
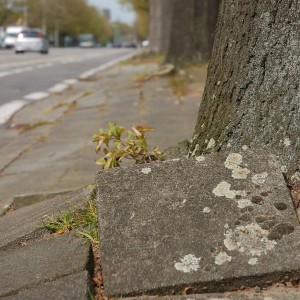 Trees need their roots to absorb nutrients and even remain standing. Big trees have strong, sturdy roots, but even those roots can be damaged.
 Changing Colors
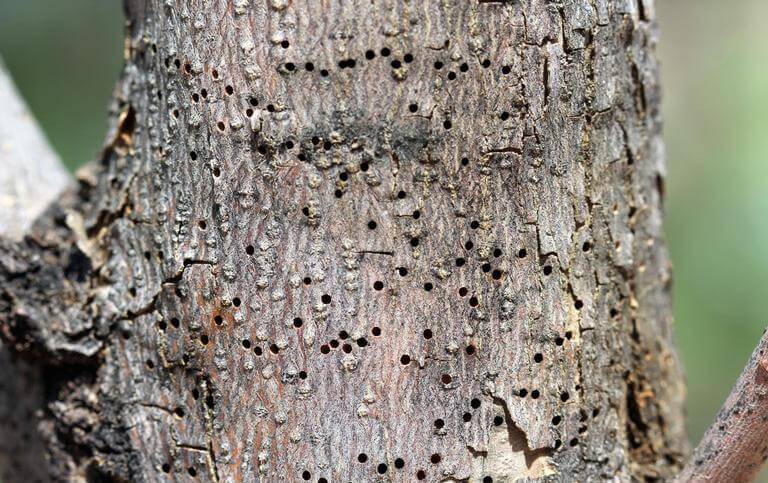

 The most common tree statewide is the Douglas fir
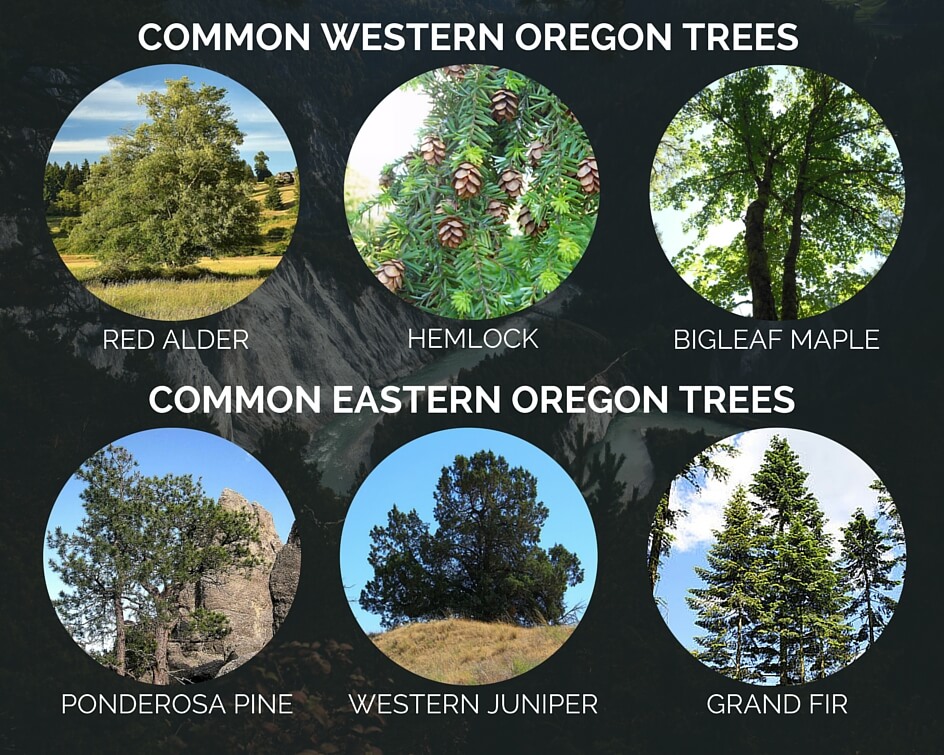


 Here’s what you’ll want to have handy:
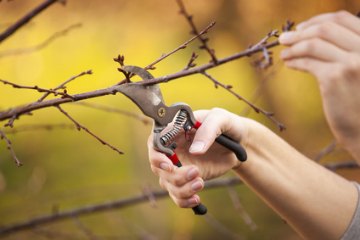


 You’ll Need:


 Published

 flushing rock salt or copper sulfate down the toilet. Copper sulfate in particular is very corrosive, though.
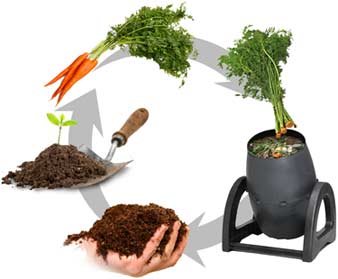 wing, and pretty soon we are going to run out of space for all that garbage! Luckily, many things we throw away can actually decompose in our backyards and even improve the soil in our gardens. Composting just might make your heirloom tomatoes grow bigger and juicier.
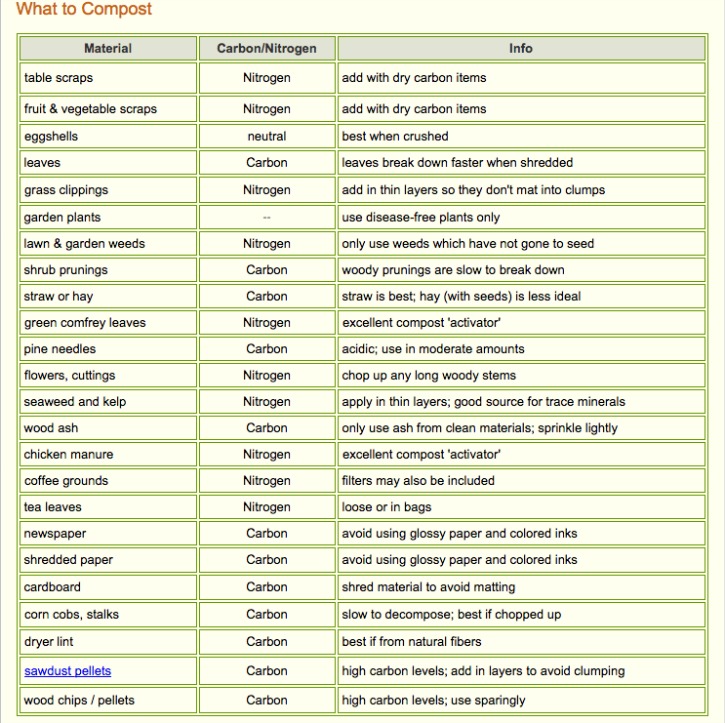


 little sad. In this guide, we reveal some of our expert compost tea tips that will make your garden healthy and your neighbors jealous.
 Compost is also difficult to spread over large areas. For the homeowner wanting to fertilize their lawn or trees, it isn’t always the best choice.


 Undernourished plants may have yellowing leaves, stunted growth and smaller than normal flowers or fruits. Signs of a fungal disease include wilting foliage, failure to flower or bear fruit, and discolored leaves. Pest problems and other diseases produce many of these symptoms as well.
 Do not apply compost tea to any vegetable within 3 weeks of the planned harvest date. Compost tea can contain some human pathogens and should not be ingested or introduced into the body.