Posts Tagged ‘infestation’
Tuesday, May 31st, 2016

Did you know that there are some trees that can live to be over 5,000 years old? While the trees in your yard won’t live that long, if they’re well maintained, they can live for 50 years or even longer! Unfortunately, many trees become diseased, rotted, or damaged before they can reach their full potential.
Today we’ll talk about some of the most common causes of tree problems and diseases as well as signs that your tree might be unhealthy and in need of help.
Weather & Storms

Our Portland climate is generally pretty mild, but our weather can still cause serious damage to trees. During the rainy months, too much precipitation can cause the ground to become waterlogged, loosening a tree’s roots. This can cause trees to lean or even topple over! During the winter, ice and snow accumulation can put stress on branches and cause them to break off
Root Damage & Loss

Tree roots are like an anchor, holding the tree steady and straight. They also absorb water and nutrients from the soil. Without a healthy root system a tree simply can’t be healthy. Since they’re underground root problems are often difficult to spot until damage has already been done. Roots can be:
- Cut or crushed by heavy construction equipment
- Infected by invasive fungus
- Damaged by lack of available nutrients or changes in the environment
Disease & Infection

Diseases and infections from fungi, bacteria and other sources can be deadly. In the Portland area, for example, elm trees are especially susceptible to Dutch Elm disease. Dutch Elm disease is caused by a fungus that’s carried by certain types of beetles. The disease can spread quickly and kill many trees if it’s not caught early. Other common tree diseases include:
- Anthracnose – A fungal infection that attacks leaves, flowers, and fruits. You’ll often see this on dogwood trees.
- Dothistroma – Another fungal infection that can kill younger pine trees. This infection causes a pine tree’s needles to fall off, preventing the tree from creating the energy it needs to grow.
- Leaf Blight – Actually a variety of related ailments, leaf blight can damage a tree’s canopy, over time weakening and killing the entire tree.
Age
In a way, trees are just like people. As they age, they become more susceptible to some diseases and ailments. The branches of older trees may weaken due to an accumulation of small cracks and breaks. Depending on the weather, older trees may dry out and become brittle and unhealthy.
Construction

Heavy construction machinery can compress soil and damage a tree’s root system. It’s important to remember that a tree’s roots extend far from its base (in some cases 30 feet or more), making it important to stay well away from trees during construction. In addition, careless use of construction equipment can rip off a tree’s leaves and branches or cause damage to the trunk itself.
So be careful when you’re doing any work in your yard!
Poor Maintenance
Trees need our help to stay healthy! If you don’t take good care of your trees, they’re more likely to suffer from disease, damage, and other common tree problems. Luckily, most trees don’t require much maintenance. They only require regular trimmings and inspections to make sure the bark, roots, branches, and trunk are healthy and stable.
What To Look Out For
While some tree problems are tough to spot, there are some telltale signs you can be on the lookout for.
Sudden Changes to Leaf Color & Density
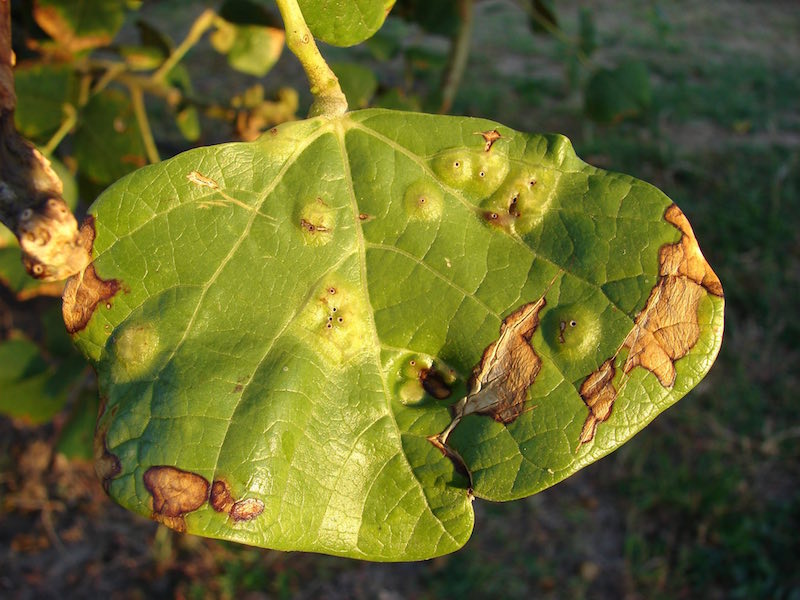
If a tree’s leaves suddenly change from green to yellow, or if leaves become splotchy or have a “banded” appearance, that could be a sign of fungal infection or disease. Or if a tree’s leaves or needles begin to fall off out of season, that’s another warning sign.
Unusual Growths & Knots
Bulbous growths or swollen areas in a tree’s trunk can be caused by bacteria growth. Fungus growing from a tree’s trunk or branches can also be signs of an unhealthy tree. These growths are often signs that your tree isn’t getting the nutrients it needs to grow normally.
Insect Damage
Insects can do real damage to the trees growing in your yard. Most of the time, it’s easy to spot insect damage because you can see insects crawling, flying, and buzzing around your tree, and most of the damage done will be to the tree’s exterior. Here’s what you should be on the lookout for:
- Leaves that look “chewed” or bitten – Beetles and some caterpillars feed on tree leaves. Too much damage to too many leaves can prevent your trees from getting the sunlight and nutrients they need.
- Leaves with unusual colors – Aphids, leaf hoppers, and other insects can damage leaves, causing them to turn yellow or develop a “speckled” appearance.
- Moldy bark – Aphids, lacebugs, and other insects excrete substances that can cause mold to grow on your trees, potentially causing long term damage.
Protect Your Investment
There are just so many benefits to having trees in your yard: they’re beautiful, can make you happier, and even make your property more valuable!
You should think of your trees as an investment that needs your attention to keep paying off. With just a bit of care and attention, you’ll be able to enjoy your trees for decades to come!
Ask a Professional
If you’re seeing evidence of these common tree problems and diseases, don’t worry. And if you’re at all worried about the health of your trees, don’t worry.
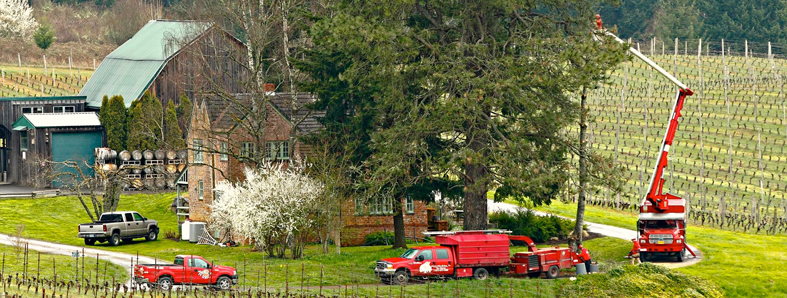
Contact NW Arbor Culture online or call us at (503) 538-8733 for a free consultation and estimation. We’re happy to come out, take a look at your trees, and let you know our expert opinion. We have over 30 years of experience caring for trees in the Portland area and know how to make sure your tree lives a long, healthy life.
Photo Credit: K. Kendall, Ash Kyd, John S. Quarterman, Robert Taylor, S. Rae, Carolyn Tiry, Forest & Kim Starr, AJ Cann
Wednesday, March 2nd, 2016
Trees provide shade, help freshen the air, and even add value to your property. We all want our trees to stay strong and healthy, but what should you do if you think one of your trees might be dead?
Dead trees don’t just look unattractive, they can actually pose a safety risk. Dead trees are more fragile. They drop branches easily and may even fall completely if not taken care of properly.
Today, I’ll show you how to tell if your tree is dead, and what you can do to keep your home, property, and family safe.
What Causes Trees to Die?
Trees live hundreds of years, right?
Many of them can, but damage and diseases can unfortunately kill a tree prematurely. In an ideal world, you’d notice the warning signs early on.
When a tree is dying, the cause of the problem usually starts underground with the roots and soil. Luckily, you can often see signs of tree death and disease above ground.
Here are some of the most common reasons why trees die:
Too Much or Too Little Water
 Making sure your tree gets enough water is especially important when it’s young. Too little water can dry a tree out, while too much can drown it.
How much water your tree needs depends on the type of tree you have and where you live. The Arbor Day Foundation has some helpful tips for how much to water your tree at each stage of its growth.
Contact your local certified arborist if you have more questions about how to water your tree.
Changes in the Soil Grade
Changes in the soil level around your tree can affect how much water and nutrients the tree can absorb. That’s because trees’ primary feeding roots are usually located in the top six inches of soil. Changing the soil grade by even just a few inches can create a problem.
If you’re thinking of adding soil to your yard, be careful. Avoid adding too much near your tree if you can.
Root Damage
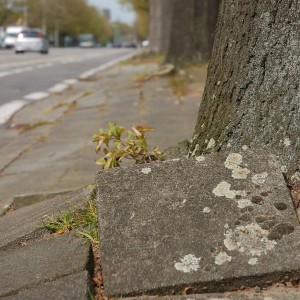 Trees need their roots to absorb nutrients and even remain standing. Big trees have strong, sturdy roots, but even those roots can be damaged.
If you have frequently driven over or parked on a tree’s roots, there’s a chance they were damaged.
Not only can the weight of a car damage roots, but all that weight also compacts the soil beneath it, making it harder for the tree to get the water, oxygen, and other nutrients it needs from the soil.
Pouring concrete, laying asphalt, or paving over tree roots can cause similar problems. If tree roots don’t have room to grow, or something is preventing them from feed from the soil, you may have a problem.
Improper Planting or Transplanting
Young trees are especially sensitive, so planting and transplanting them can be risky. A couple common mistakes are:
- Digging a too shallow or too deep hole
- Packing the soil down too hard after planting
Both can smother the tree and prevent proper root growth.
Tip: Any time you plant or transplant a tree, be careful of the root ball (the tangle of roots at the bottom of a young tree). If there is burlap or twine tied around the roots, remove it carefully. Then, gently loosen and separate the root ball just enough to help the roots spread out before you place the tree in the ground.

Photo: Anthony LeBude, NC State University, Bugwood.org
What Does a Dead Tree Look Like?
The warning signs will be slightly different depending on what type of tree you’re dealing with. Usually, though, you’ll be able to tell if there’s something wrong.
What should you look for?
Falling Leaves or Needles
A tree that is dying or dead often loses its leaves or needles very quickly and suddenly. Or it has no foliage whatsoever, even during a time of year when it should.
 Changing Colors
Unexplained discoloration of the foliage is another common sign of stress or disease — usually one of the first ones you’ll notice.
Brown, multi-colored needles are a common sign of sickness in conifer trees.
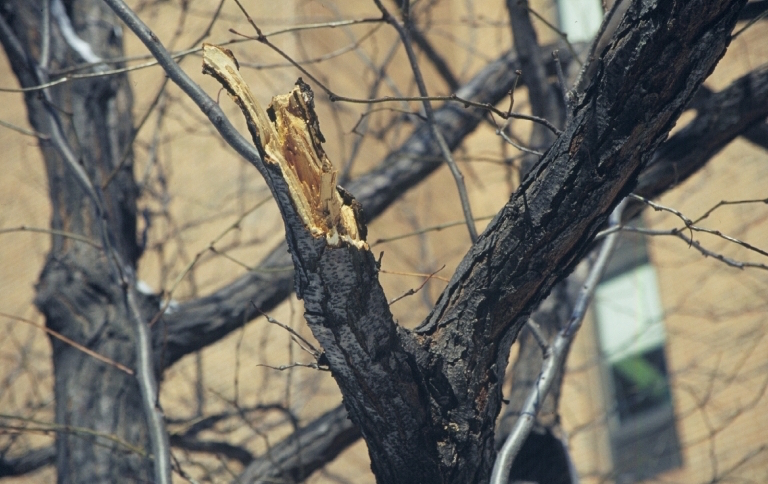
Cracks and Splits
Big cracks or splits in the structure of the tree can be a sign that the tree is dead, especially if other warning signs are also present or if the crack is in the trunk.
Changing Bark
A strange or different bark texture can also spell trouble. Tree bark is often a good indicator of the tree’s overall health. If bark is missing, loose, dry, or brittle, be concerned. When branches lose their bark, it means those branches are most likely dead.
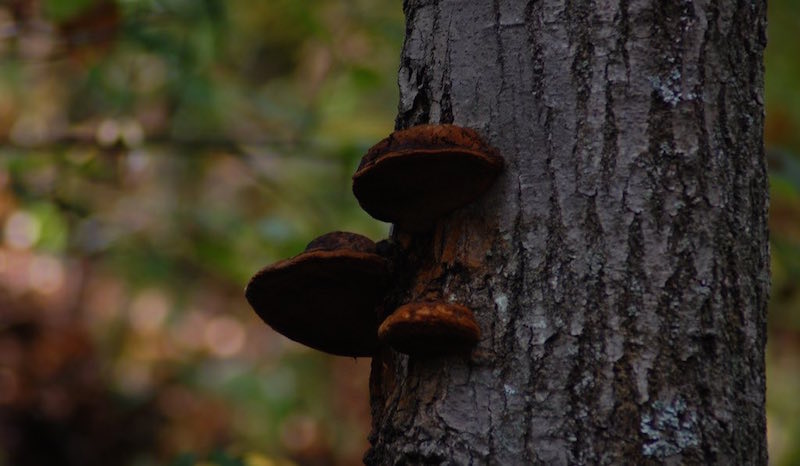
Infections and Infestations
Animals and fungi often start taking over dead trees too. Fungus usually only grows on decaying wood, so keep an eye out for mushrooms!
Insects like carpenter ants and beetles often set up camp in dead wood too. Look for rows of small holes in the wood or places where wood has clearly been eaten away:
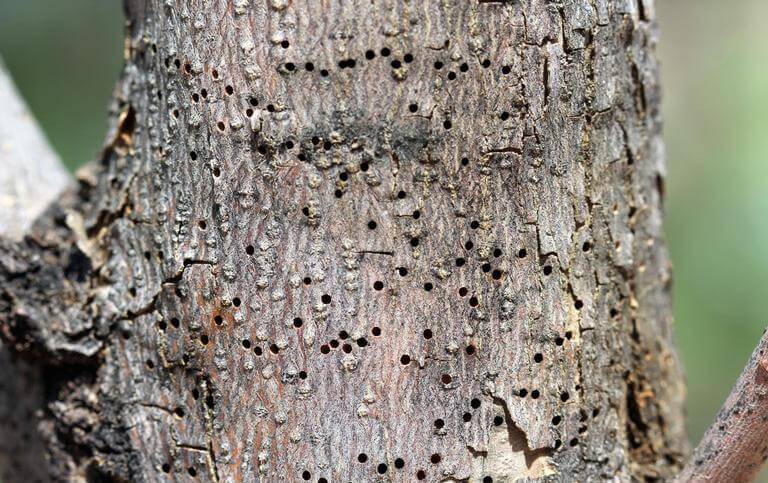
Photo: Whitney Cranshaw, Bugwood.org
Rotting Wood in the Trunk
A weak or spongy trunk can be a sign that a tree is rotting from the inside. If you notice this, call your local certified arborist right away. Rotting in the trunk is a sign that your tree may no longer be stable. You’ll want to get it taken care of before branches start falling, or worse, the whole tree comes down.
What Can I Do if My Tree Is Dead?
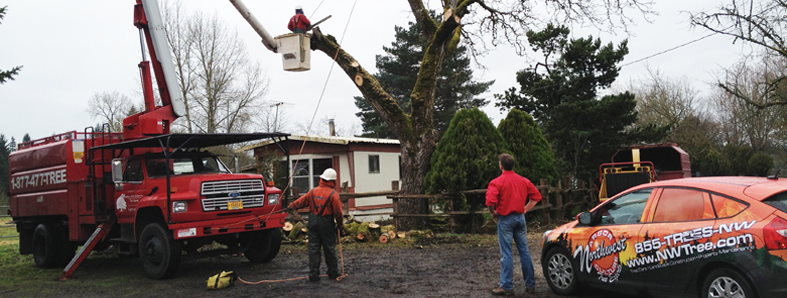
If your tree is dead, your best option is to have a professional come and remove it safely. If it’s a large or precariously positioned tree, you’ll want to do this as soon as possible.
If your tree is simply old, sick, or just unstable, you may have other options besides tree removal, such as cabling and bracing. Depending on the cause and extent of the damage, you might be able to salvage your tree or at least increase its life.
No matter what state your tree is in, an arborist, like us at Northwest Arbor Culture, can help you determine the best course of action for keeping your home safe and beautiful.
If it turns out your tree needs to be removed, we can help. We’ll even get rid of the stump for you! With over 30 years of landscaping experience, we can also help you decide what to do with the empty space or help you reconfigure your entire yard if you like!
If you’re worried about one of your trees, don’t wait until it’s too late.
Give us a call today at (503) 433-8791!
Photos: Joseph OBrien, USDA Forest Service, Bugwood.org; Wouter Verhelst; Aidan Grey
Tuesday, May 20th, 2014
Bugs play a very important role in the health of your trees and garden.
Pollinators, like bees and butterflies, allow the plants around your home to flower and produce fruit. Ground beetles eat vegetable munching slugs and snails in your garden. Spiders help reduce the population of disease spreading mosquitoes and flies.
 While bugs can be beneficial to our fruit trees and gardens, there are also many critters that can cause extensive damage and death to your plants.
This article will educate you about several common plant pests of the Pacific Northwest. We will help you identify some of the symptoms of harmful infestations. Reviewing the steps you can take to defend your garden and landscape from pest damage.
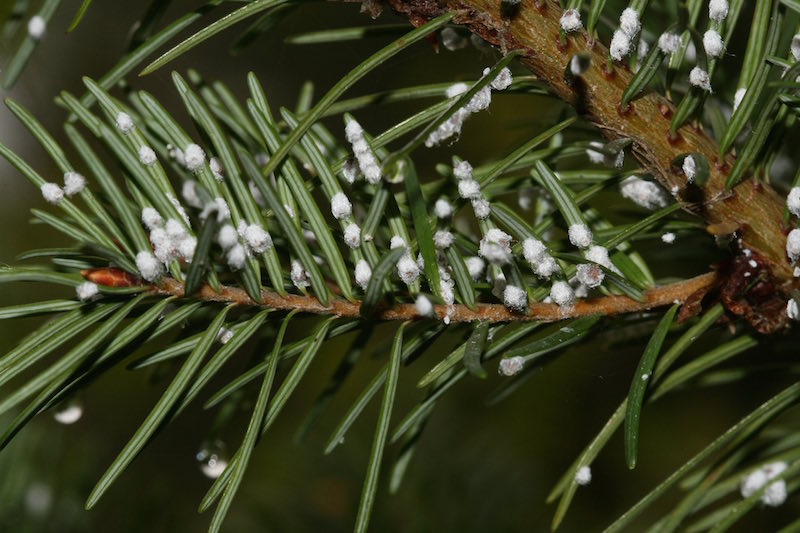
Aphids
Aphids are one of the most common plant pests. They suck the sap from trees and plants causing the leaves to curl and die. Aphids also release excess sap from their bodies often causing plants to mold.
These frequent bugs come in several different colors and can affect any plant from roses to hardwood trees. Their bodies are usually 1/10th of an inch long and are easy to spot on the leaves and stem of your plants. Aphids have a short reproductive period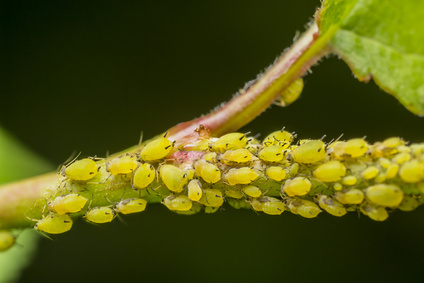 (10-14 days) and a population can explode in no time.
But how can you hope to control an Aphid outburst in your yard?
Treatment – A small infestation can be wiped away with a cloth or blasted off with a garden hose. Sprays made of household soap and water or garlic oil can help prevent aphid growth as well. Avoid insecticides that can kill helpful bugs in your garden.
Spider Mites
Spider Mites are tiny mites that feed on the leaves of many different plants. With eight legs and miniature bodies, they pierce the protective surface of leaves and create tiny holes. The plant then loses water through the open holes causing the leaves to dry out and die.
These bugs are so tiny that the best way to detect them is by holding a piece of white paper under the suspected infestation. After gently tapping on the leaf or branch you will be able to see tiny black flecks that are moving on the paper.
Spider Mites can infest indoor and outdoor plants of all kinds. In the Northwest, Spruce Spider Mites are can be found on many of our common conifer trees like Doug-fir, pine and spruce. Also infesting arborvitae and other common ornamental shrubs.
Treatment – Similar to Aphids spider mites can be hosed off of plants and sprayed with a soapy water mix. Spruce Spider Mites require an addition application of ‘horticultural oil’ to kill eggs surviving through the winter.
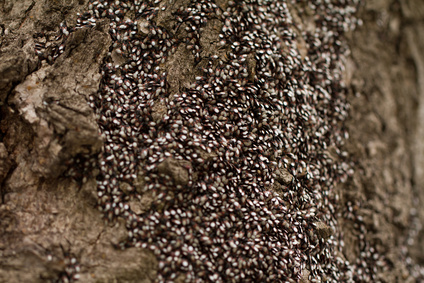
Insect Borers
Common insect borers include the Asian Longhorned Beetle and the Bronze Birch Borer. This type of large bug tunnels into the trunk and branches of plants and trees. Often attacking hardwood trees such as maples, ash, and elm. The bugs then lay eggs in their tunnels effectively blocking off water and nutrient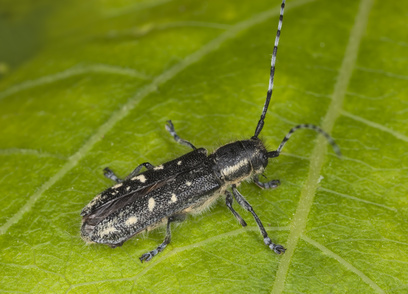 s from traveling through the tree.
An infestation can be identified by large holes in and sawdust at the base of your tree. Yet, often times it can be too late to save a tree once it is infested.
Treatment – Insecticides can kill insect borers but are not always very effective. The best way to avoid an infestation is to keep your plants and trees healthy.
Insect borers and many other pests are attracted to dead and dying wood. If you prune, water, and fertilize your trees, they can naturally fight against insect borer infestation. Make sure to remove any fallen branches and dead wood around your trees that might also attract these pests to your healthy plants.
Preventing Insect Infection
There are many different harmful bugs that can infest your trees and garden. But the key to preventing general insect infestation is keeping your plants healthy. A healthy garden harbors a diverse population of beneficial bugs. Many of which eat and destroy the common insect pests we discussed in this post.
 Keeping your plants watered, fertilized, pruned, and mulched can help maintain your yards natural defenses against invading insects.
But, If you find an infestation in your yard that is out of your control, don’t hesitate to call a professional. The experts at Northwest Arbor Culture Inc. are not only arborists, but master gardeners, as well. We know how to control any infestation and can help you salvage your plants and trees. Before it’s too late.
Have you ever had a insect infestation in your yard? Let us know the methods you used and the challenges you experienced in the comments section.
Wednesday, April 9th, 2014
It’s time for tea, and we’re not talking about chamomile.
Compost tea is a healthy drink for your plants or lawn. It can be a great way to spruce up any parts of your yard that are looking a  little sad. In this guide, we reveal some of our expert compost tea tips that will make your garden healthy and your neighbors jealous.
Arborists know that adding compost to soil can increase the minerals and nutrients available to your plants. This is like plant food – it helps your plants grow big and strong. Compost also contains bacteria and fungi that help protect plants from disease and infection.
But compost can be arduous to spread. Sometimes what seems like a large amount can be surprisingly little – not enough to give your plants the nutrients they need.
That’s where ‘compost tea’ comes into the mix.
Making compost tea is simple. The process is very similar to making actual tea. You can spread it over large areas, covering plants with microorganisms that fight the spread of plant diseases and improve the health of your plants.
What is ‘Compost Tea’?
“Compost tea is a liquid extract of compost that contains plant growth compounds and beneficial microorganisms.”
(OSU Extensions Services)
Agriculturists have used liquid extracts and fertilizers for hundreds of years. Solid compost is a great source of beneficial nutrients, but you can only mix it with the soil. This forces the plant to create its own ‘protective barrier’ of microorganisms on its foliage.
 Compost is also difficult to spread over large areas. For the homeowner wanting to fertilize their lawn or trees, it isn’t always the best choice.
Compost tea is the solution to these problems. It allows agriculturists to take the best parts from compost and put them in liquid form. You can easily spray that liquid over an entire plant or lawn.
Generally speaking, there are two types of compost tea: aerated and non-aerated. While we want you to become a compost tea expert, we’re going to take baby steps.
Making aerated compost tea gets complicated (and expensive). For the sake of learning, this post will focus on the simplest method of making compost tea.
Making Farmer’s Tea (Non-aerated Compost Tea)
The process of making Farmer’s Tea resembles that of brewing actual tea. Like the name implies, you make non-aerated compost tea by ‘steeping’ or soaking compost in water.
While your compost is soaking, you’ll need to stir and agitate it by hand. This introduces air into the mixture, allowing colonies of good bacteria, fungi, and yeast to grow in the liquid.
Once the water is saturated with beneficial nutrients and fermented with microorganisms, you want to strain it into a spraying device and apply it to your plants.
That’s an overview of the whole process – start to finish. Now we’ll cover each step in more detail.
Materials Needed
You can pick up all these materials at your local nursery or garden shop.
- Two 5 gallon buckets
- Water source (not chlorinated) *
- Ready-to-use compost (organic and not entirely manure-based) **
- Stick or tool for stirring
- Burlap sack or a large knit cloth bag
- Handheld spray bottle or garden sprayer for application
* Do not use chlorinated water. It will kill the organisms in your tea and contaminate your plants.
** The most important ingredient in your compost tea is the compost. Quality compost contains thriving colonies of microorganisms and helpful plant nutrients. If you start with quality compost, you’ll make a quali-TEA. That is, a quality tea.
Avoid using animal manure compost. These composts don’t contain the same amount of microbial colonies as organic compost. It can also contain E-Coli and other harmful human pathogens.
Step 1
Make sure that your equipment is clean and free of contaminants like pesticides and chemicals. These can kill helpful microorganisms and contaminate your plants.
Step 2
Fill your bucket about half full of compost.
Step 3
Pour water on top of the compost until the bucket is nearly full to the top with water.
Step 4
Let your compost soak in the bucket for at least one day. Some people like to brew their tea for an entire month, but one to eight days is a sufficient amount of time.
You should agitate the mixture with your stirring tool at least twice a day. Stirring introduces oxygen into your liquid and helps bring nutrients into solution. The more often you stir your fermenting tea, the quicker and stronger the beneficial microorganism colonies should grow in your tea.
Note: If you are brewing your tea on a hot day, make sure that you are stirring more often (once an hour). You also want to keep your mixture out of direct sunlight and harmful UV rays.
Step 5
Once your tea has been brewed you should strain the particles out of the solution. For this part of the process, you’ll use your burlap sack or any type of large knit cheesecloth-like material.
Pour the mixture through the cloth into the second 5 gallon bucket. You can reuse the separated compost particles as a soil amender, or throw them into a compost pile.
Using Your Compost Tea
Now that you have successfully brewed and strained your batch of compost tea, you should be left with a particle free, amber colored liquid. If your liquid is very dark, it may be too concentrated and can be diluted by adding extra water until a lighter color is achieved.
Fill your clean handheld spray bottle or garden sprayer with compost tea and water. A general guide to tea dilution is as follows:
- For house plants use a 1:1 (tea to water ratio)
- For larger areas like lawns or trees use a 1:3 (tea to water ratio)
As you begin applying your protective brew teaming with microorganisms to your plants observe the health of the plant to guide how much tea you spray. Sick plants will generally need larger amounts of tea than healthy plants.
When Should You Spray? And How Much?
Whenever you see signs of disease or undernourishment these are good indicators that your plants may need a dose of compost tea.
 Undernourished plants may have yellowing leaves, stunted growth and smaller than normal flowers or fruits. Signs of a fungal disease include wilting foliage, failure to flower or bear fruit, and discolored leaves. Pest problems and other diseases produce many of these symptoms as well.
To use your compost tea, you can spray it on plant foliage (leaves), spray or soak the soil around a plant, or even treat seedlings by dipping their roots into compost tea before planting them.
Medium houseplants require about 2 cups of tea each treatment. For lawns apply tea once or twice a month during growing season, just before or just after regular watering. One gallon of compost tea mixture covers about 1,000 square feet.
If you are seeing signs of disease or undernourishment spray at least once a month, or as often as every other week. If you have healthy plants, spraying once or twice a season can still be beneficial.
Note: Do not spray your plants in direct sunlight or excessive heat. UV rays and extreme temperatures can damage your compost tea.
You may not see immediate changes in your plant health, but be patient. It takes some time for the beneficial microorganisms to grow and proliferate around and on the plant.
Storing Compost Tea
You can only keep and use compost tea for several days after decanting from the original brew.
Compost tea does not keep well for long periods of time because the living microorganisms in the solution will quickly ‘eat’ all of the available food and eventually die. By storing compost tea properly, you can help it stay ‘good’ for several days after decanting.
Store compost tea away from direct sunlight and harmful UV rays. Also, make sure to keep your tea away from extreme temperatures (between 60-90 degrees F).
Do not store your brew in a closed container. Natural biological and chemical reactions can create pressure and cause a sealed container to burst.
Cautions With Compost Tea
 Do not apply compost tea to any vegetable within 3 weeks of the planned harvest date. Compost tea can contain some human pathogens and should not be ingested or introduced into the body.
Also, not fully matured compost can contain E. coli. Make sure your compost is fully broken down to help ensure that no unwanted pathogens are introduced into your compost tea.
Creating quality, fully matured compost is a very complex subject that we will explore in a different post. Until then, here is a link to making quality compost.
Beautiful Blooms & Green Gardens
Now that you know how to brew amazing compost tea and properly spray your struggling plants, all you have left to do is sit back and enjoy the fruits of your labor.
Soon you will have jealous neighbors complimenting your gardening prowess and begging for your growing secrets.
Have you ever made compost tea before? We’d love to hear about your personal tea recipes and success stories in the comments section.
Sources: